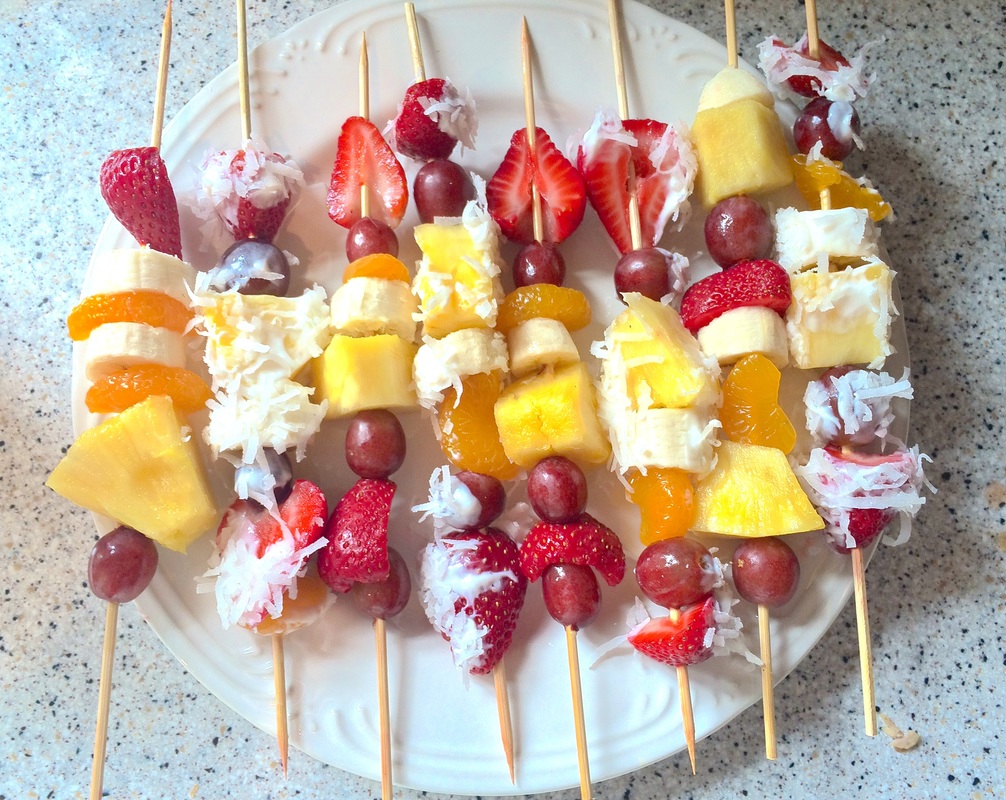
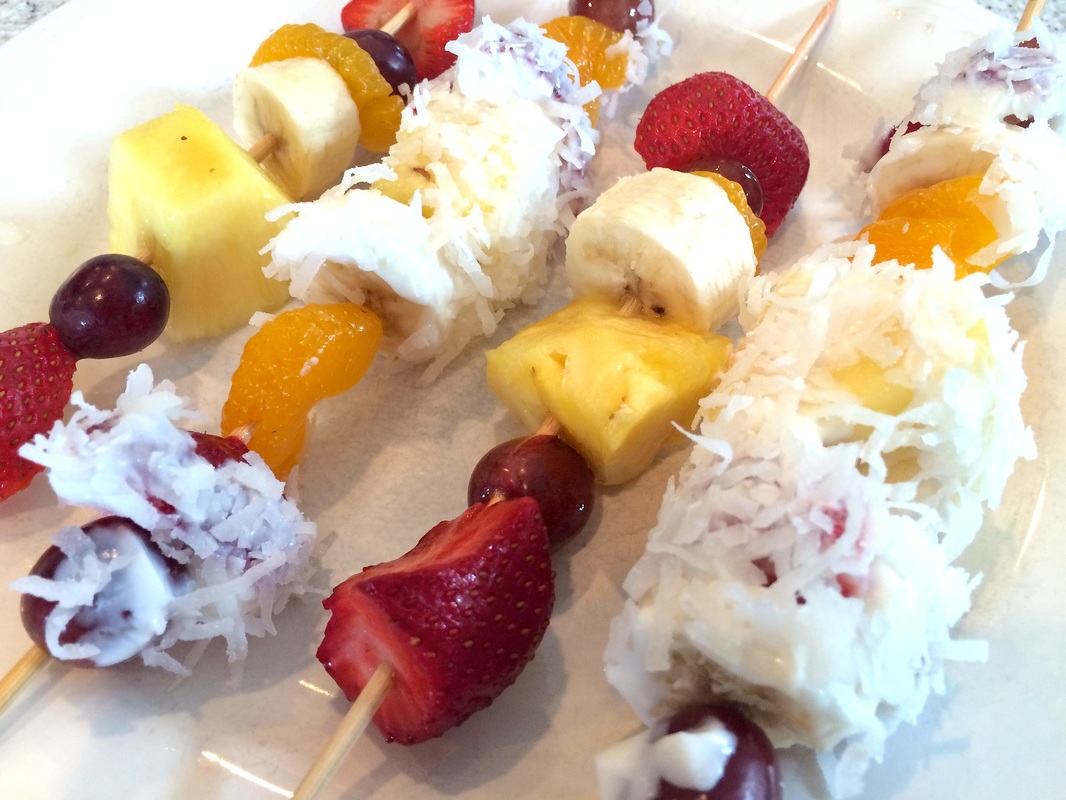
A colorful, fun summer treat!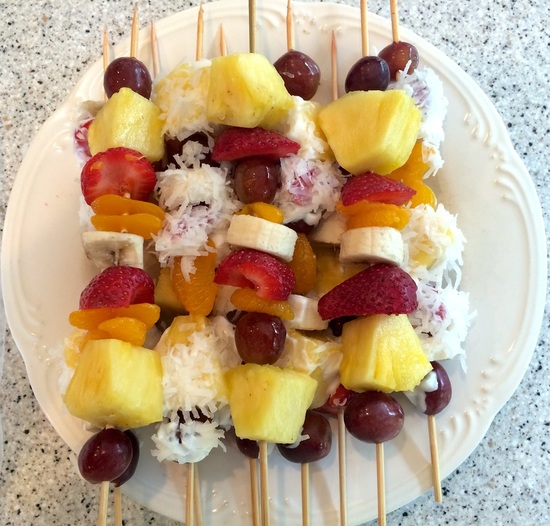 These fruit kabobs are something my mom and I have made for several years. They're great for a delicious summer breakfast, but you can have them anytime! They are so colorful and pretty…and fun to make! Perfect for when you have company…we had family visiting when I made these. My sweet little cousin Anna helped me make them and we had a ball! Here's all you need: 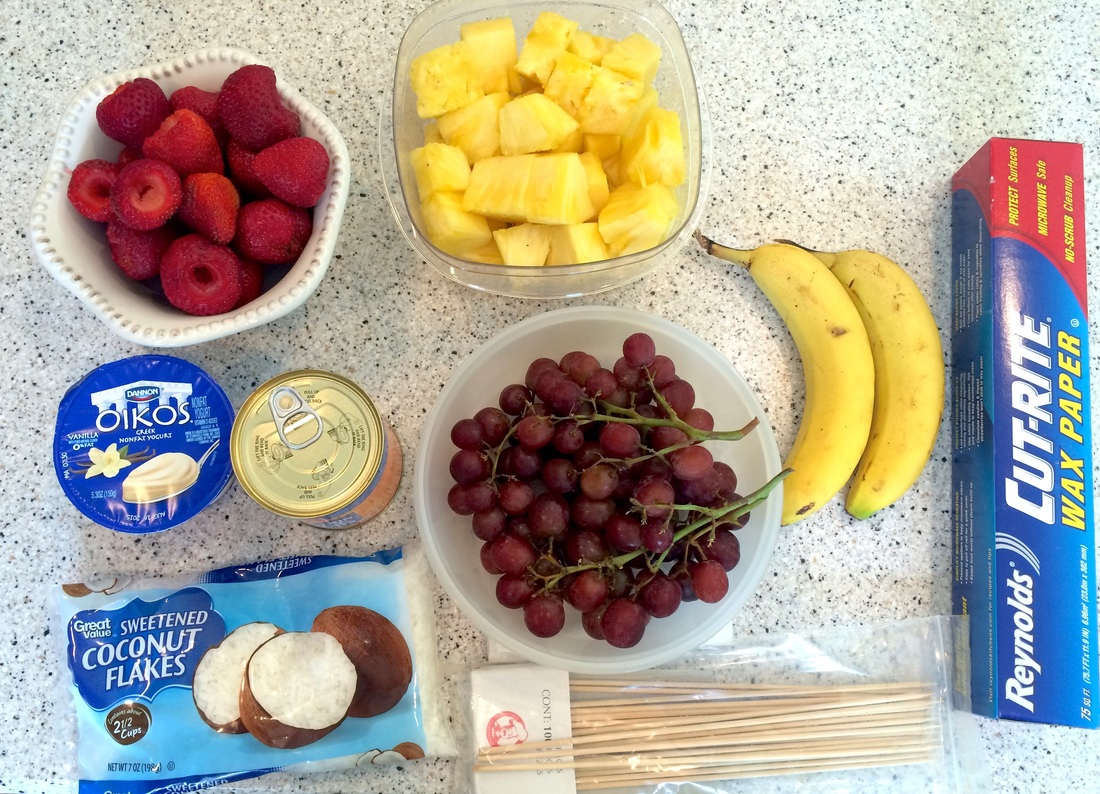 Fresh strawberries (capped and halved) Red grapes Pineapple chunks (fresh is better, but you can use canned) Thickly sliced bananas Mandarin orange slices (from a can is fine) One cup of vanilla Greek yogurt (regular yogurt works fine too) Coconut flakes Wax paper Wooden skewers Instructions First, line all of your fruit in an assembly line. At the end of your assembly line, spread wax paper with the cup of yogurt on it, then spread coconut for rolling the skewers.  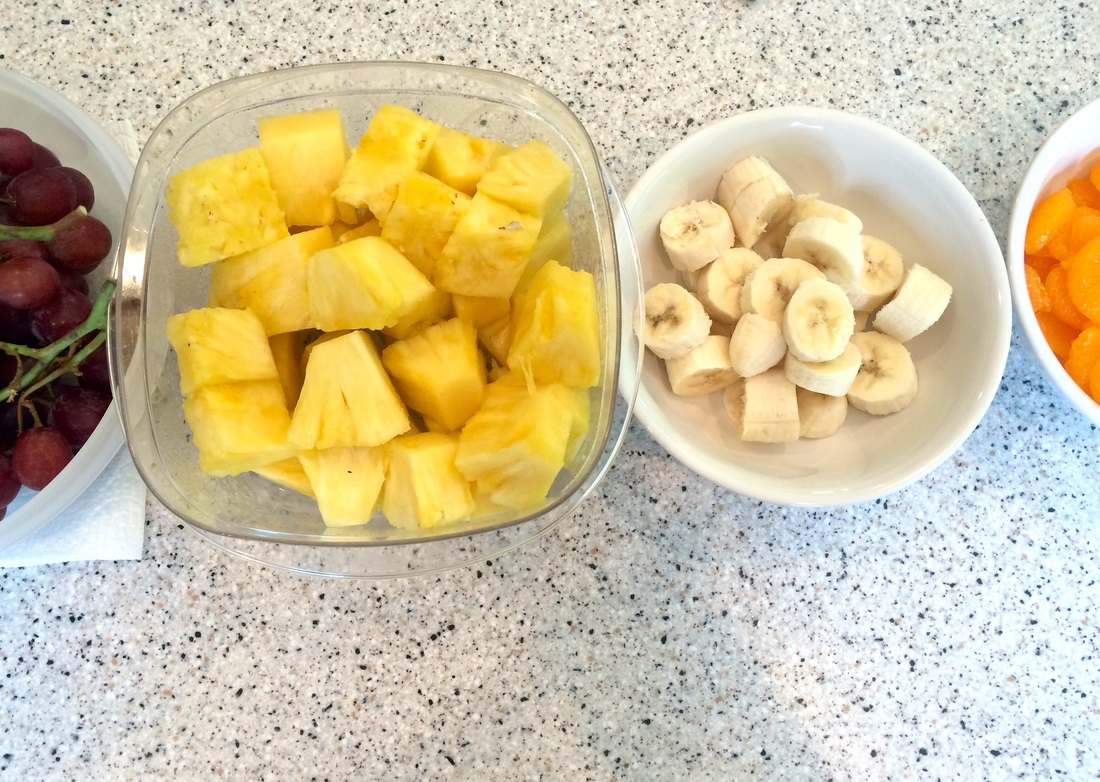 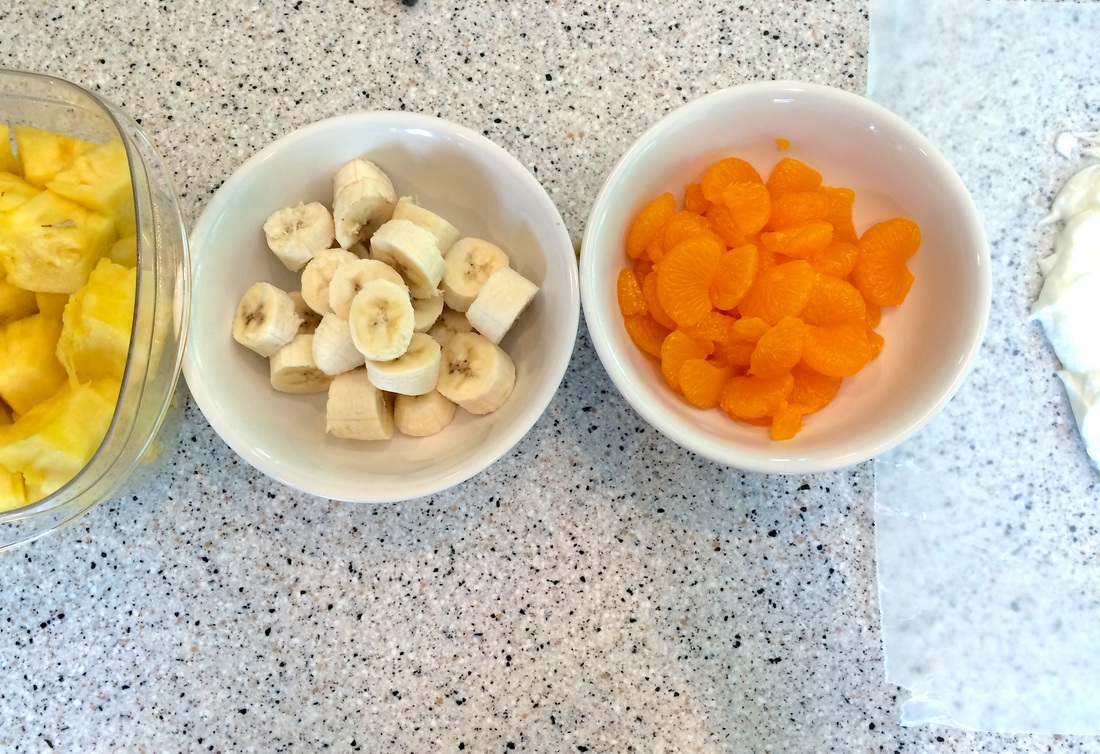  Arrange the assorted fruits on each skewer, pushing them down on the pointed end. You can mix up the order to make them different. When you have filled the stick and made a kabob, holding the wooden ends of the skewer, roll the kabob in the vanilla yogurt, coating as much as you can. Then, roll the kabob in the coconut flakes and place on serving plate. Usually we coat all of ours in the yogurt and coconut, but since we had company, we made some plain as well. When finished, just lay and stack them on the serving plate to create a colorful, pretty display! 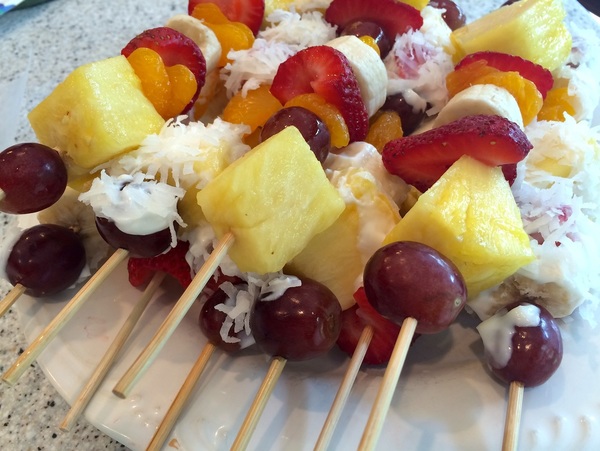 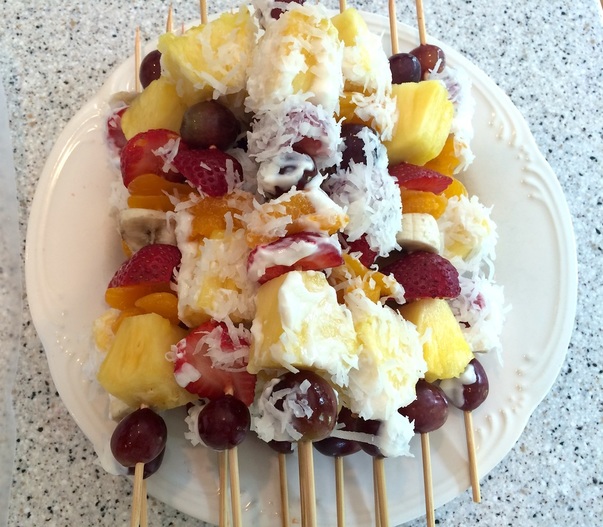
0 Comments
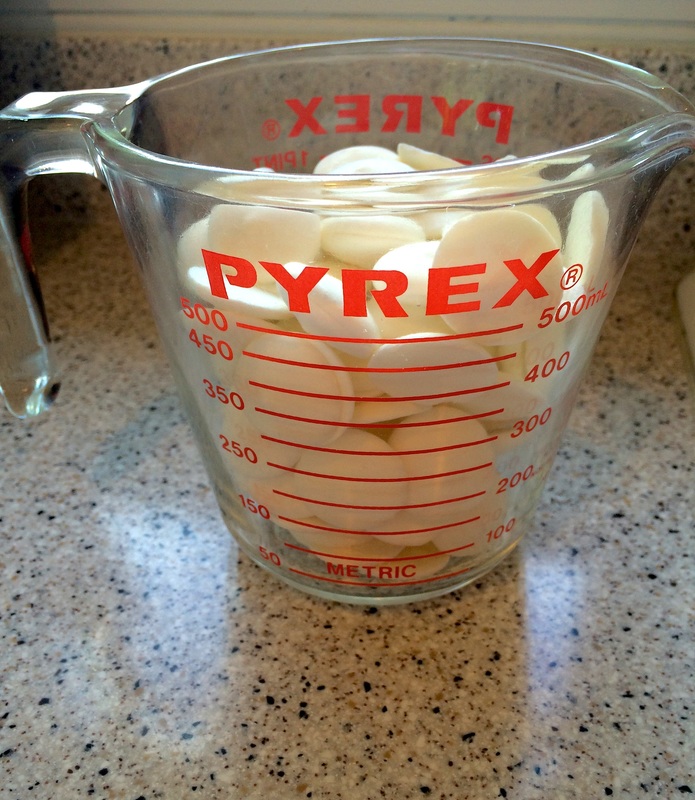
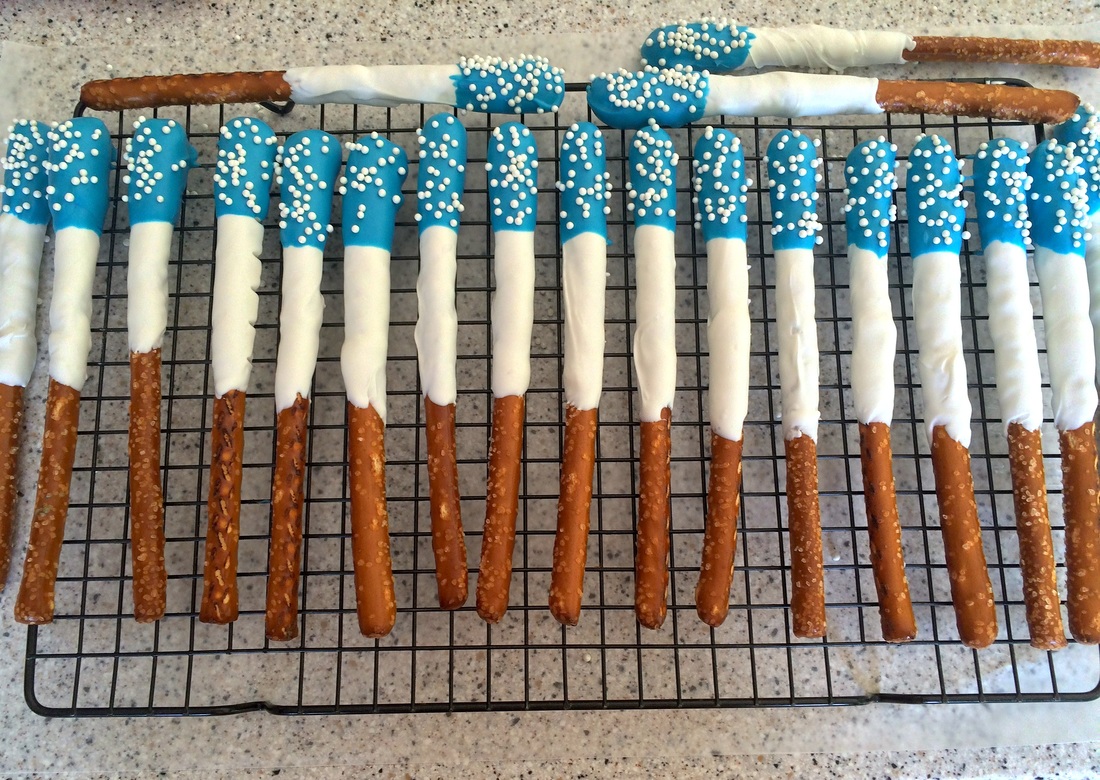
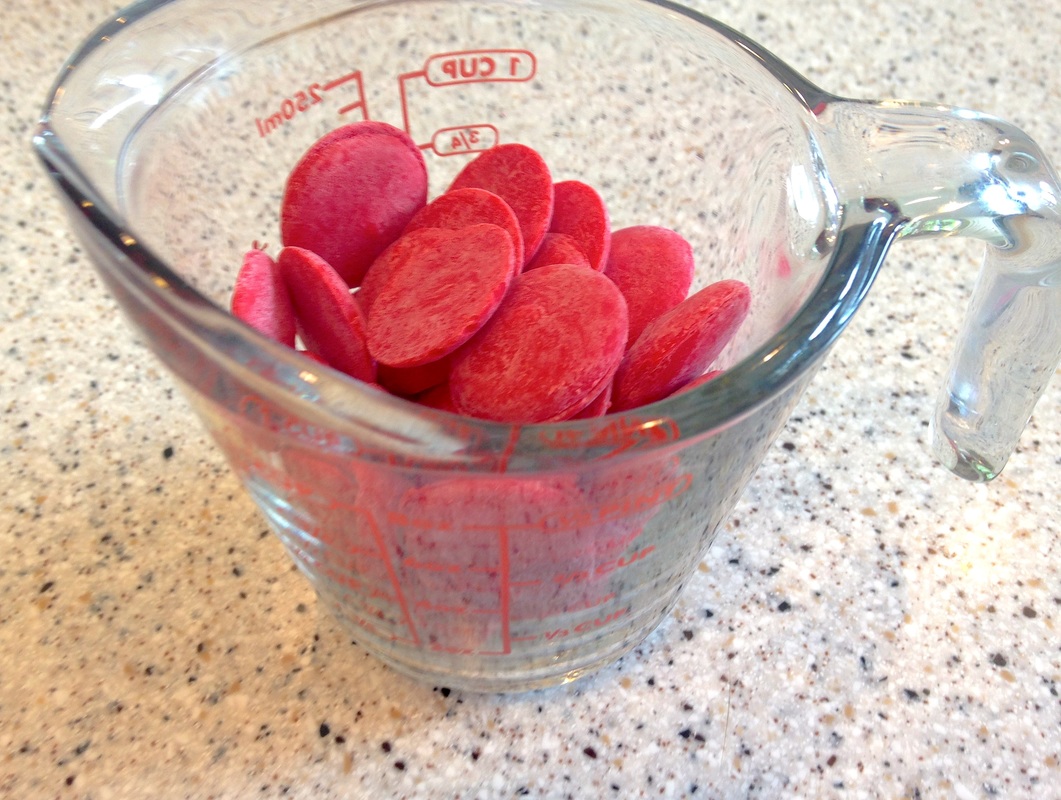
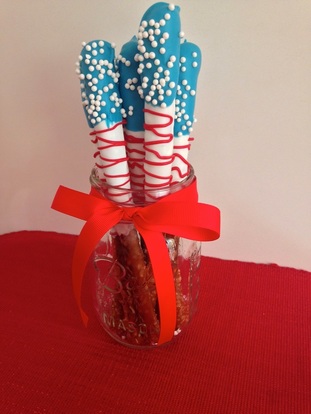
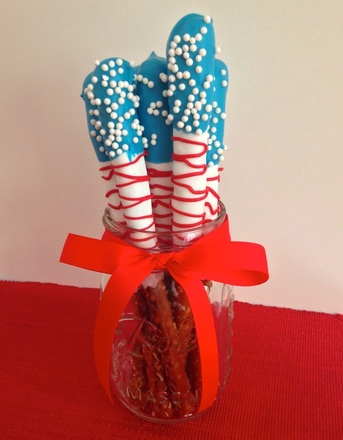
A trip to one of my favorite places in the world…Chapel Hill, NC!I made a trip to Chapel Hill recently…here are some of my favorite places to go in the "Southern Part of Heaven." It doesn't get much prettier or fun than Chapel Hill. The town has so much to do and see, and the university is gorgeous. I had a blast visiting my sweet alma mater and getting to see some friends. If you're ever in the area, here are some great places to visit! The Old Well 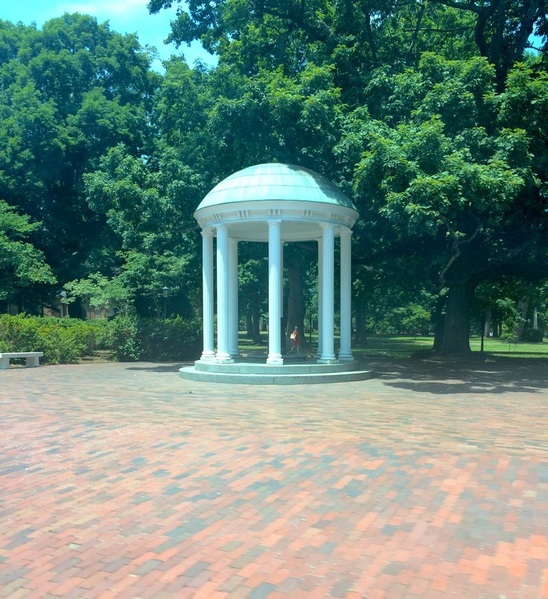 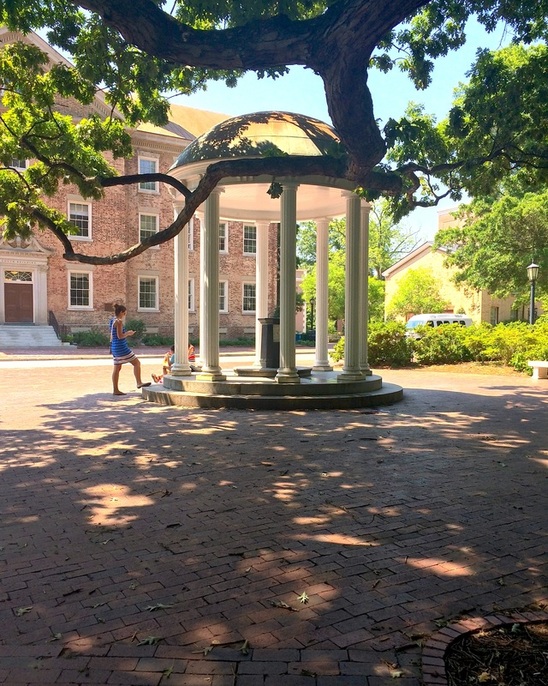 If you have a chance to see this beauty in the spring, all the azaleas are in bloom and it is the prettiest! 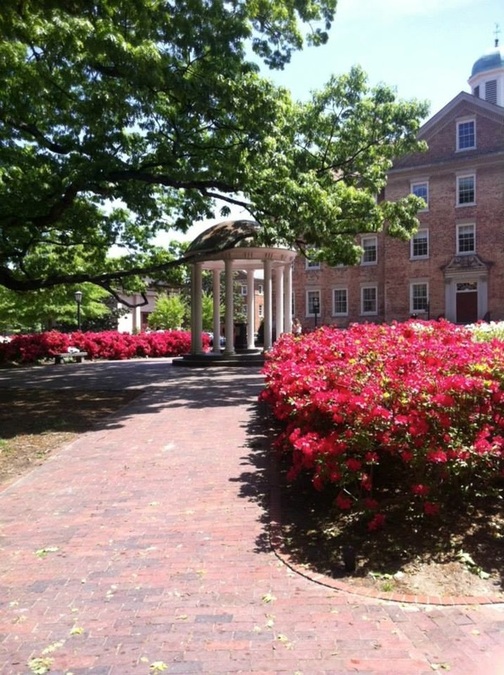 The Dean Dome (Dean E. Smith Center) 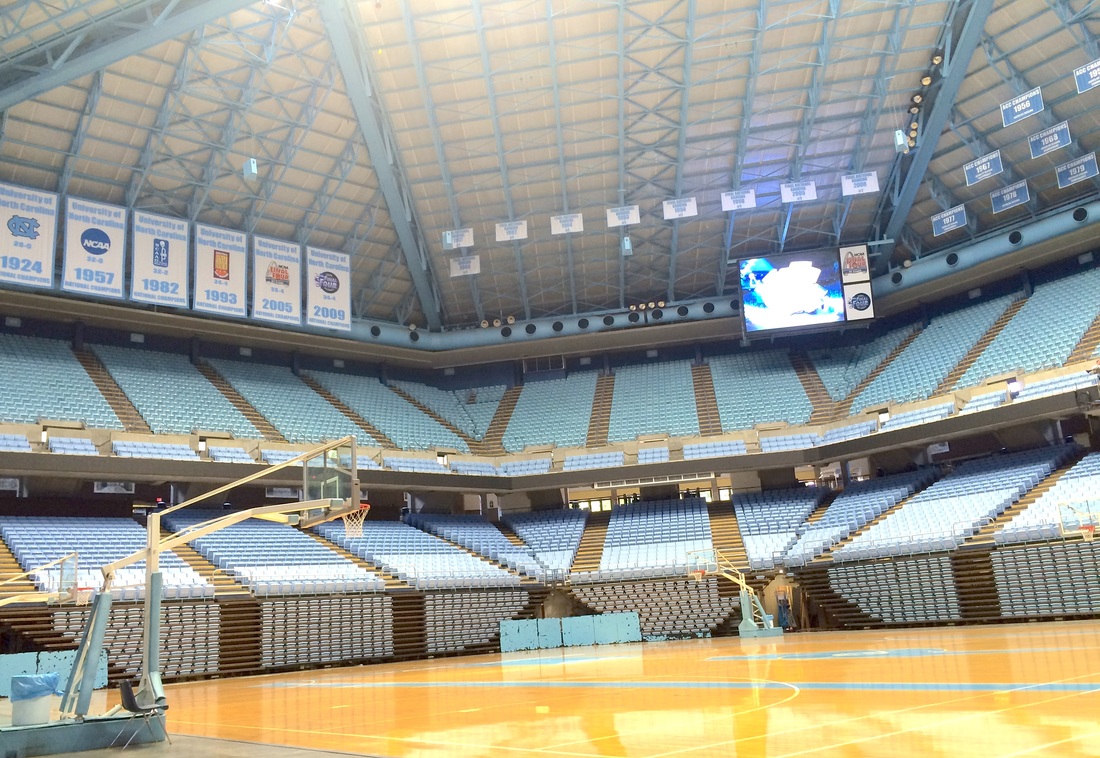 This place is magical. If you're a Carolina basketball fan, you know how awesome of an atmosphere this is. It's definitely one of my favorite places on campus. These are also quite a beautiful sight... 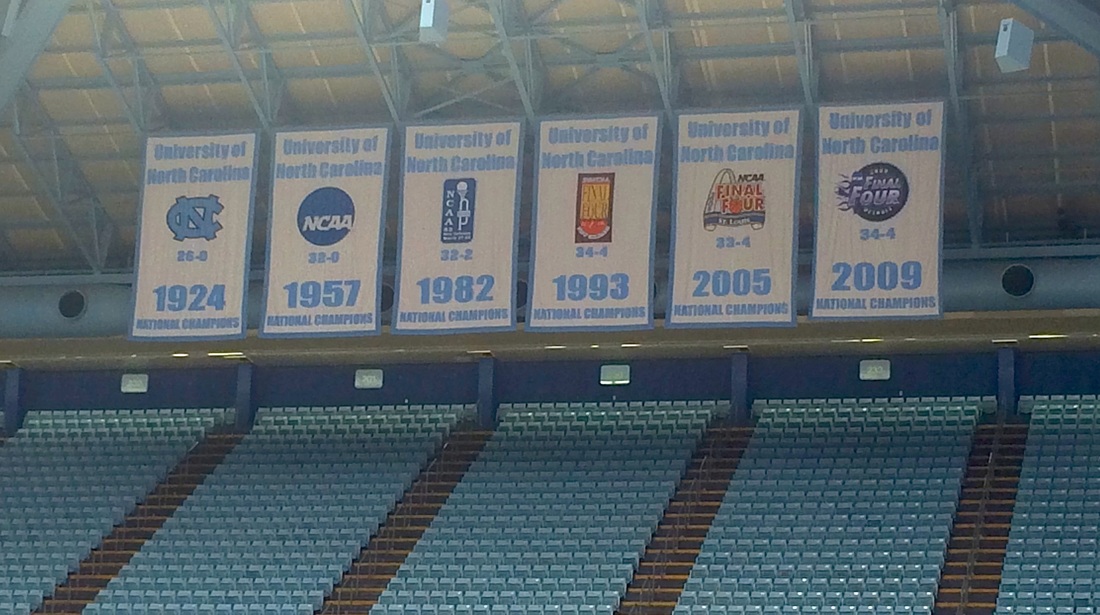 Maple View Farm 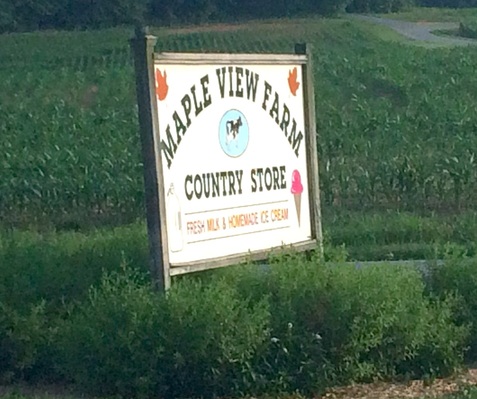 This is an awesome farm and homemade ice cream shop in Hillsborough, NC, just outside of Chapel Hill. It is such a fun place to go…their ice cream is so good and you can sit on the front porch rocking chairs and look out at the pretty fields! Here is Maple View's website! 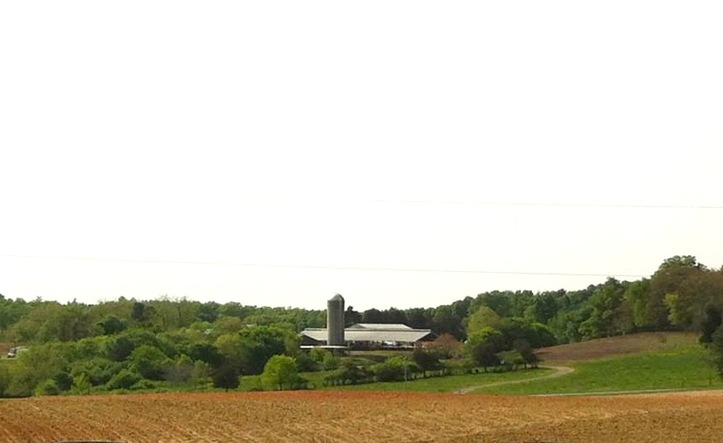 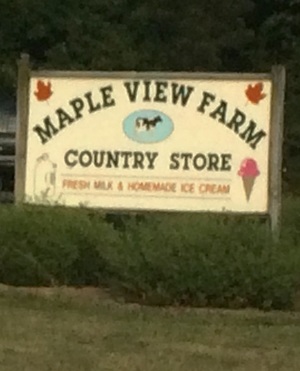   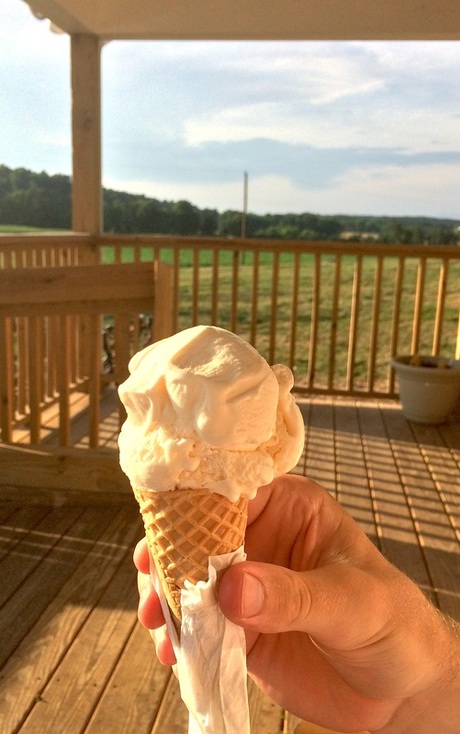 The Bell Tower  This is another beautiful campus landmark, right near Kenan Stadium. My name is on a brick somewhere up inside that tower :) The Carolina Inn 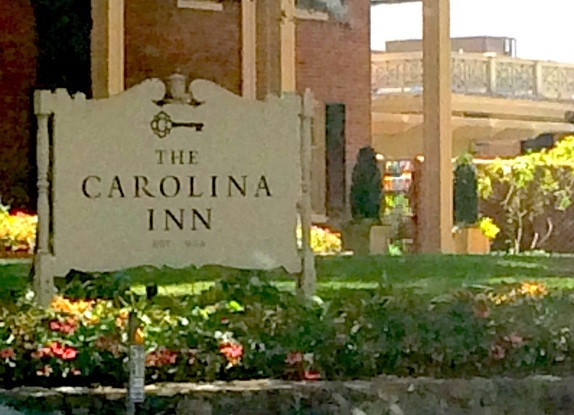 This is a historic, pretty hotel on campus. It also has a great restaurant. If you don't stay there, drive by to look at it! Find them online here. Sutton's Drug Store 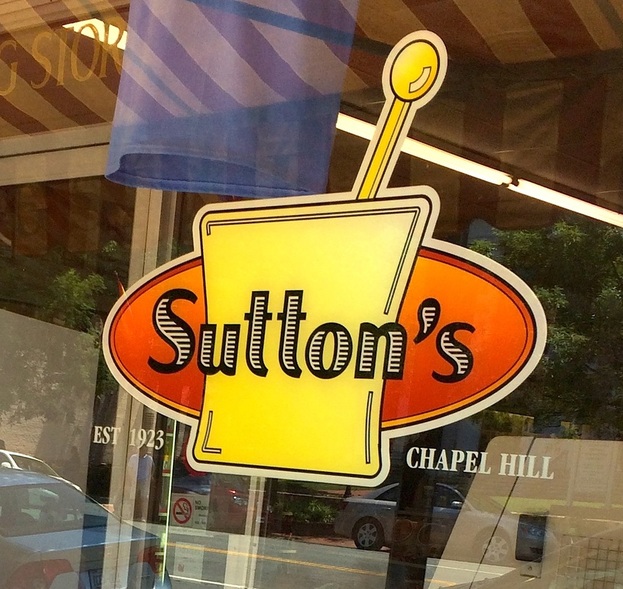 Sutton's is one of my favorite lunch places on Franklin Street. A former pharmacy, it has awesome food and is such a fun atmosphere. It has so much history too…established in 1923! Find them online here. 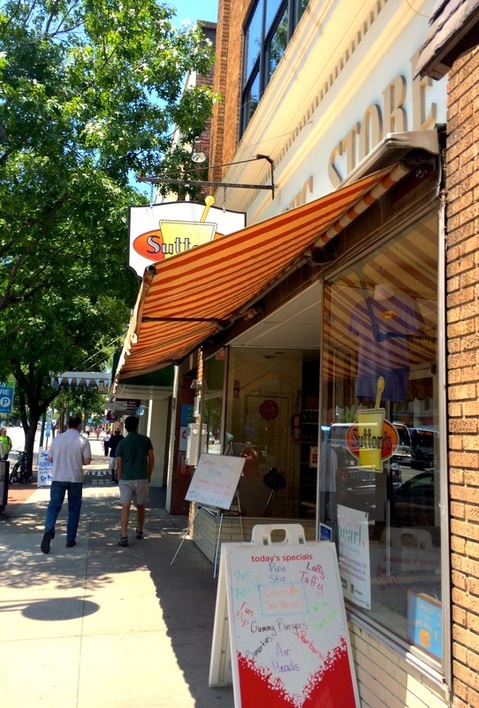 UNC Quad/South Building This is just another one of the beautiful places on campus! 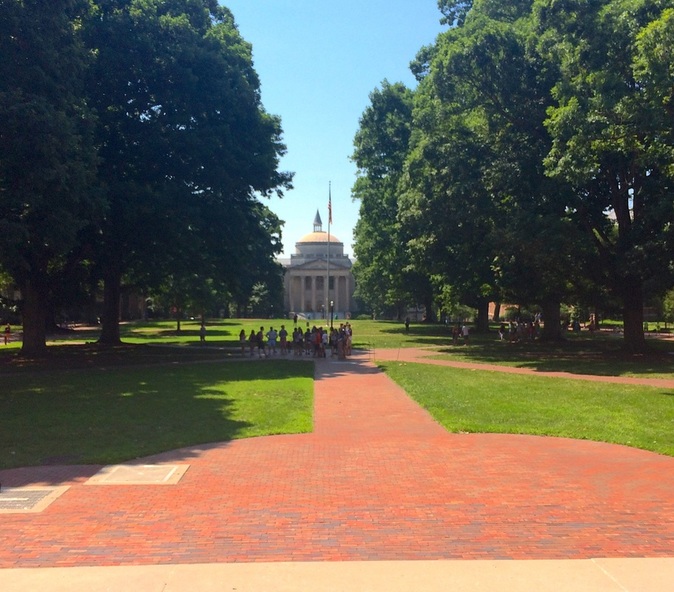 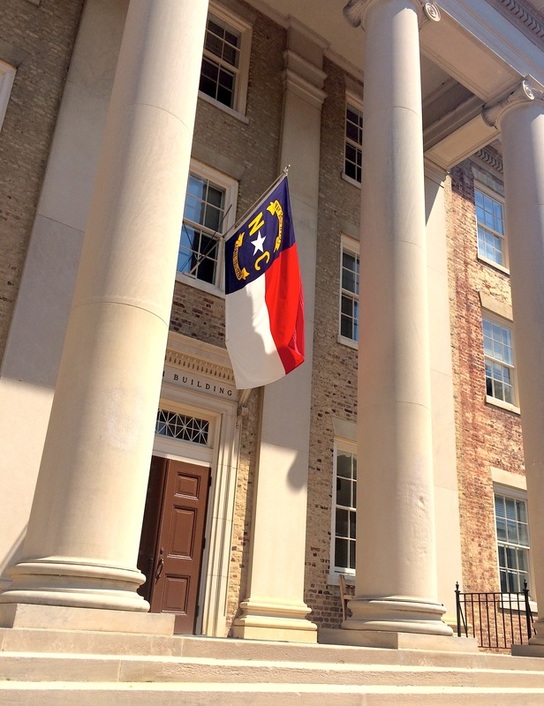 Some of my other favorite places... Some other places I either didn't get to go this trip or didn't snap photos of are… The Yogurt Pump (YoPo): an old, cute frozen yogurt shop on Franklin Street. Find them online here. Johnny T-Shirt and Chapel Hill Sportswear: great shops for UNC gear on Franklin Street. Find them online here and here Sugarland: The cutest place with great cupcakes on Franklin Street. Find them online here. Top of the Hill: a restaurant on Franklin Street…if you eat outside, it's a cool view of Chapel Hill. Find them online here. Nantucket Grill: a great restaurant on Farrington Road, Chapel Hill…they also have the BEST cake…Strawberry Shortcake is my favorite! Find them online here. Boshamer Stadium: The Carolina baseball stadium…also one of my favorite places on campus! Merritt's Store and Grill: The best BLT in North Carolina…and a really fun place! Find them online here UNC Student Store: This is a great shop on campus for UNC gear. Find them online here. Go Heels!Patriotic Pretzel Rods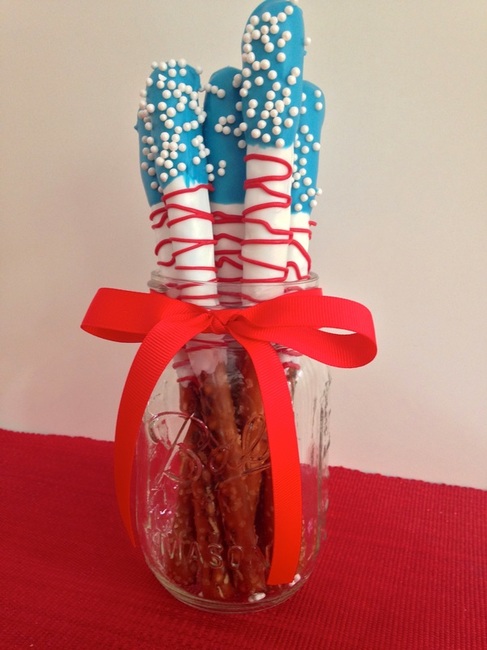 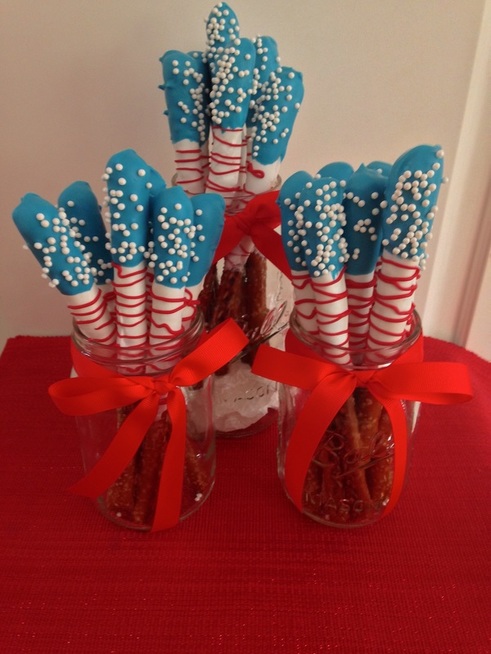 My mom and I found this cute idea on Pinterest…from a site called "The 36th Avenue." You can find the site here. I decided to try these dipped pretzels for a fun 4th of July treat! They turned out to be adorable and pretty simple…and such a fun little project! All you need is a pack of pretzel rods, a pack of bright white melting candies, a pack of red melting candies, and a pack of blue melting candies (I used all vanilla flavored candy melts). You'll also need white sprinkles (I used mini decorative pearls!), wax paper, a cooling rack, and a plastic Ziploc bag. 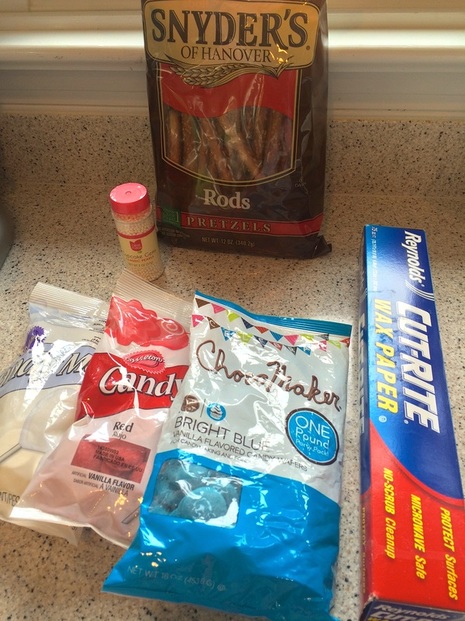 First, place the cooling rack on top of a piece of wax paper. Then melt the white candies in a deep enough dish or cup to dip the pretzel rods. Make sure they melt completely but don't overheat them or they will get too thick! I used a medium-sized glass measuring cup. Dip the top of each of the pretzel rods about 3/4 of the way in the white melted candy. I used a fork to help put the melted candy on the pretzel and smooth it out. Place the pretzel rod on the cooling rack (or right on the wax paper) to dry. 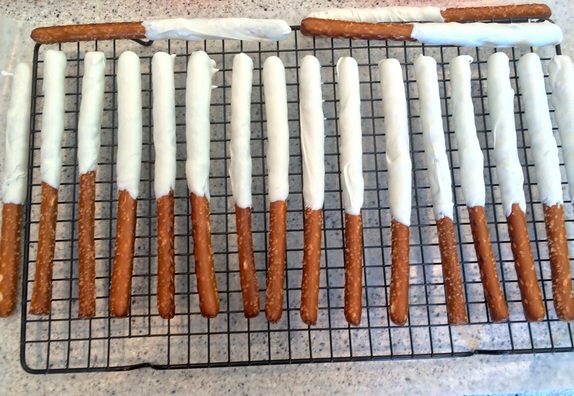 After the white has dried, melt the blue chips in another microwave-safe cup or bowl. Dip the tops of the pretzel rods in so that the blue covers about 1/3 of the white. Place on the cooling rack again to dry. While the candy is still wet, sprinkle the mini pearls/sprinkles on top of the blue. Do these one at a time, or the candy will melt too quickly for the pearls/sprinkles to stick! After the blue is completely dry, melt the red chips (I didn't need to use the whole bag) in a microwave-safe cup or bowl. Once they are completely melted well, pour the melted red chips into a plastic Ziploc bag and close it. Cut a tiny (very!) hole in the corner of the bag. Then you are able to pipe thin red lines over top of the remaining white on the pretzel rods. Here is the cute finished product! 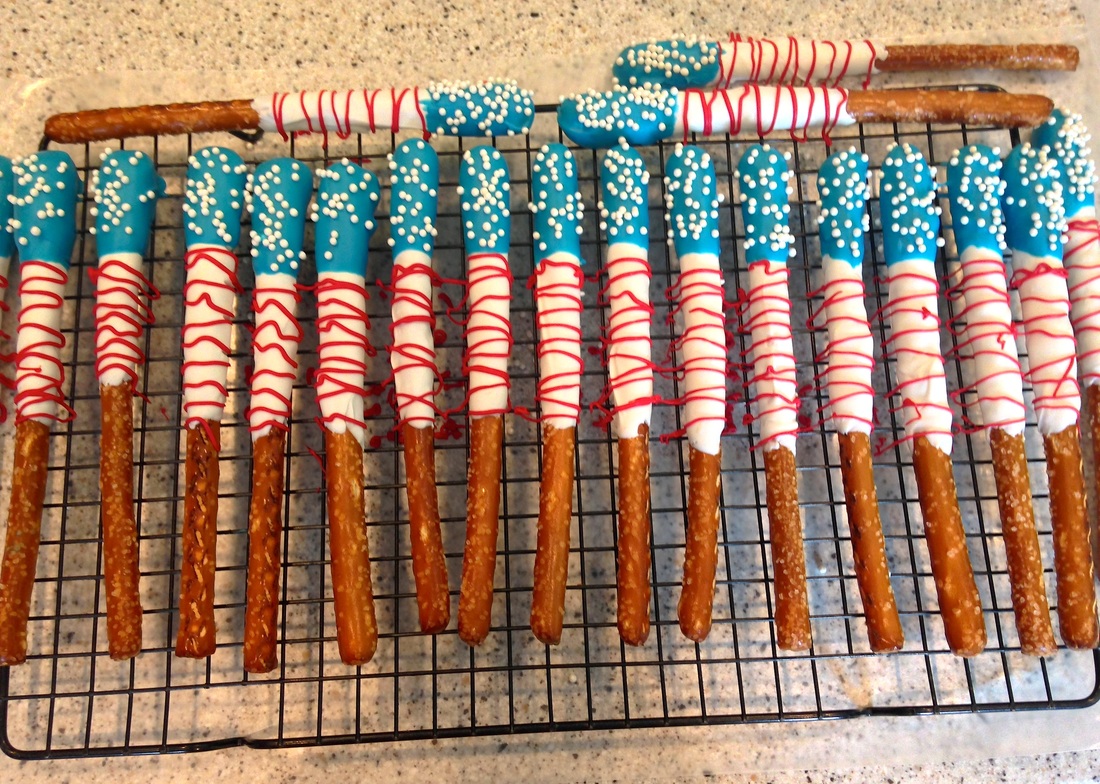 When they were all completely dry, I tied some ribbon around the mouths of several mason jars. Then I gently placed the pretzel rods in the jars. This is an easy little project and it makes cute, festive treats for your 4th of July celebration! I had such a fun time making them too!
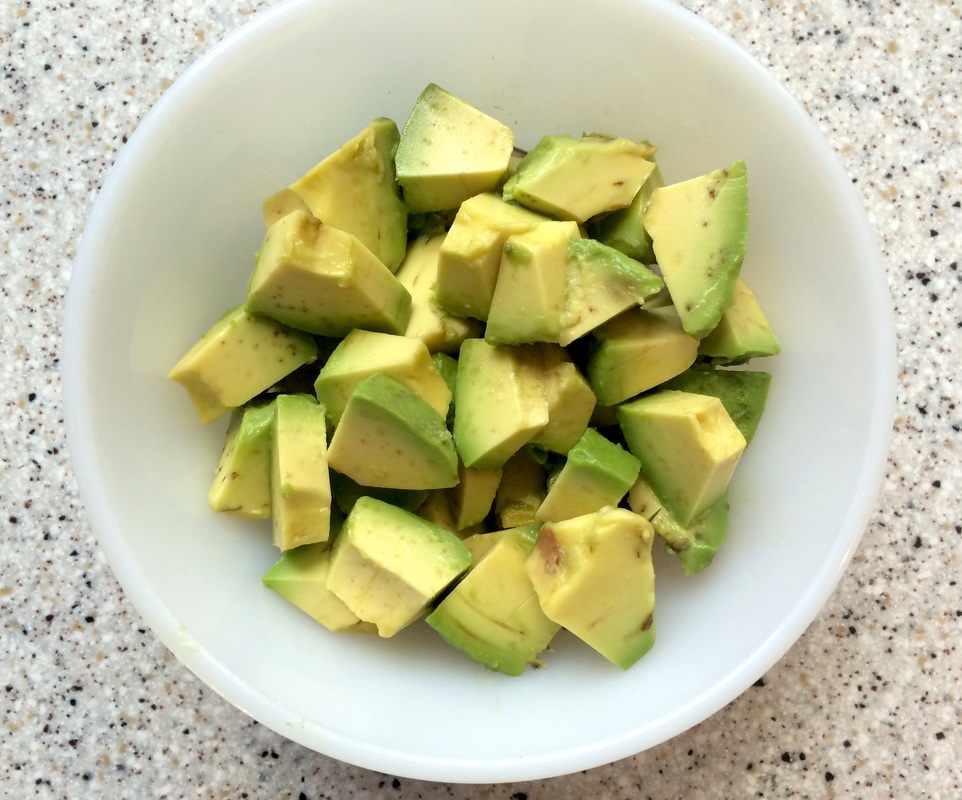
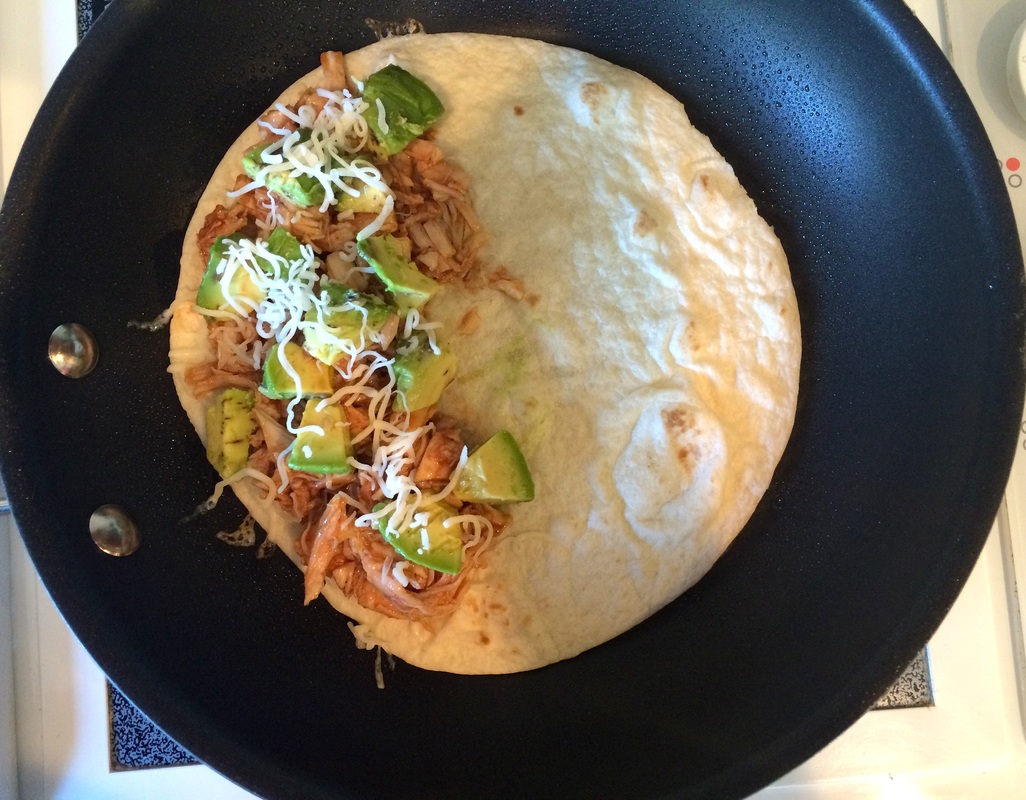
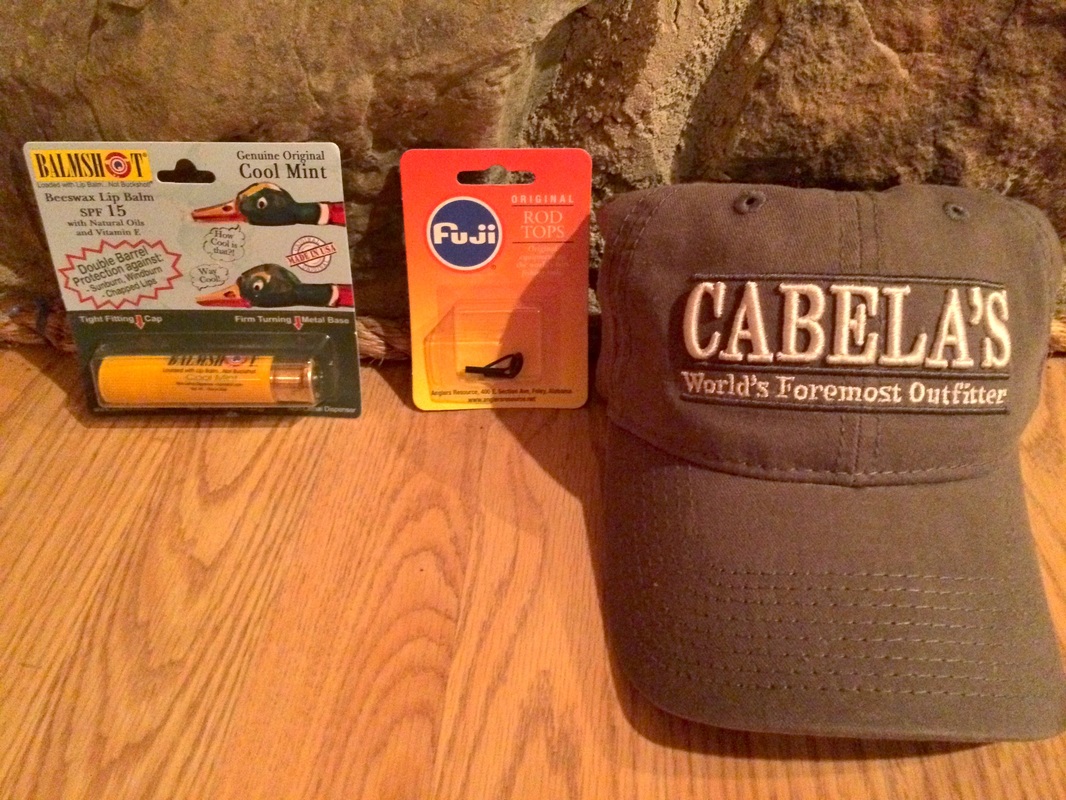
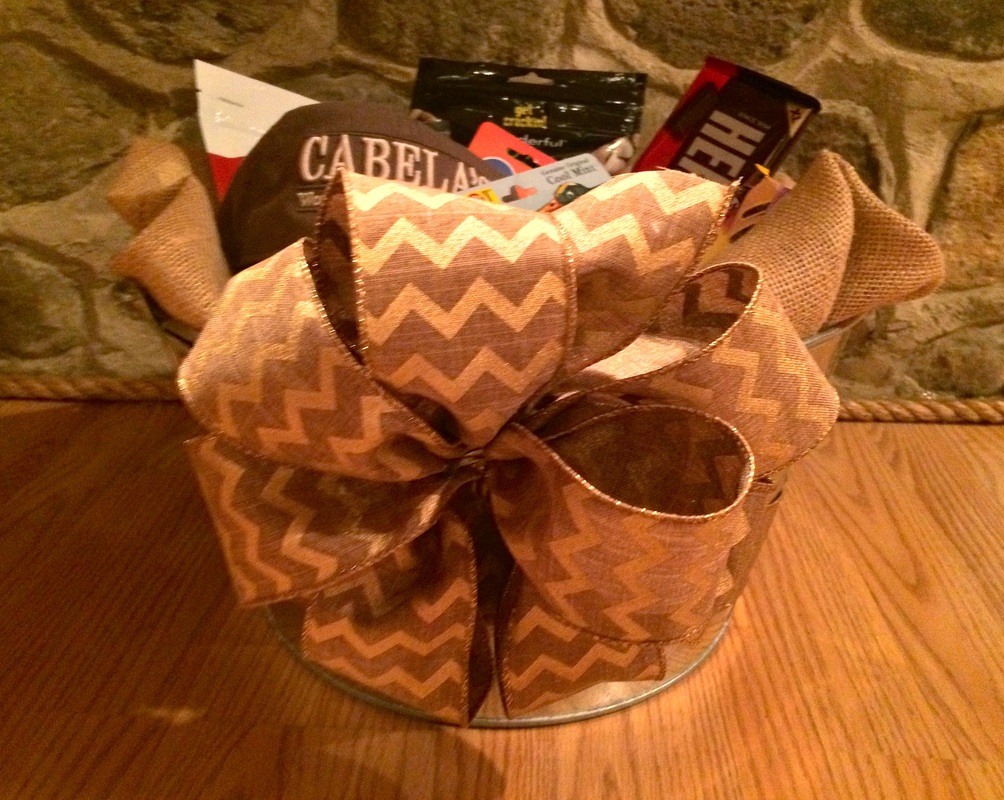
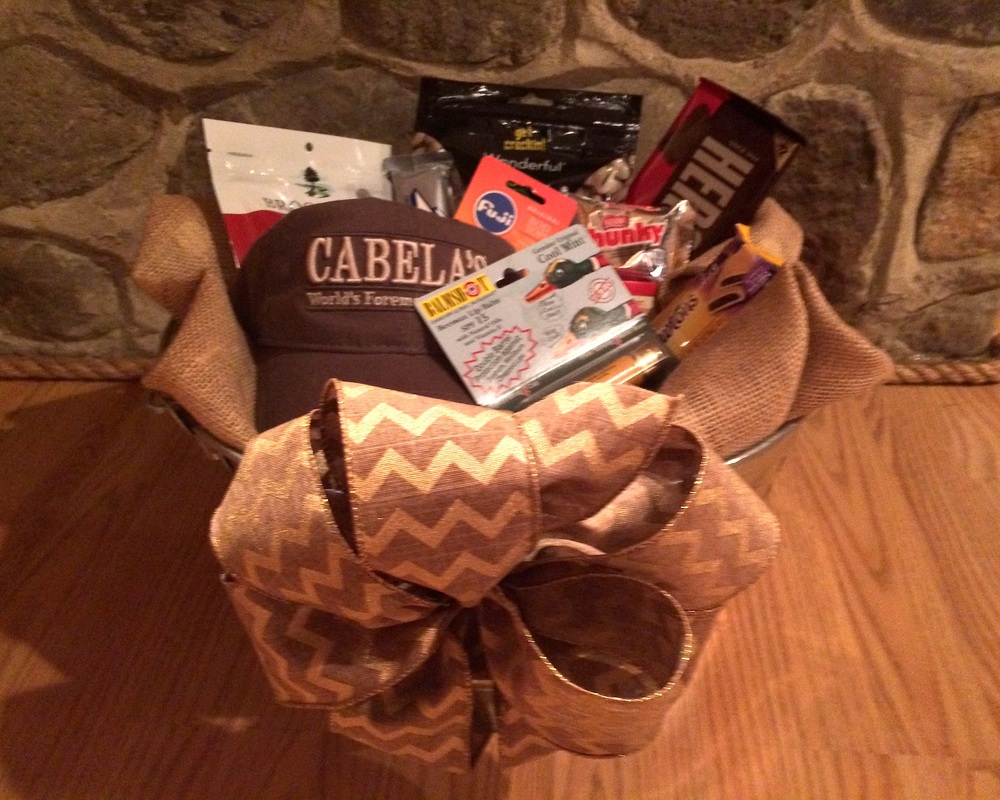
I also had some leftover melted candies so I used them to make some more festive pretzel rods…solid blue with red piping and white pearls on top! I added them in with the others for the display! 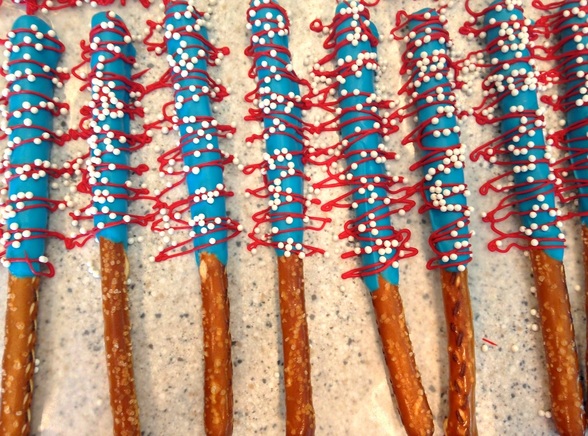  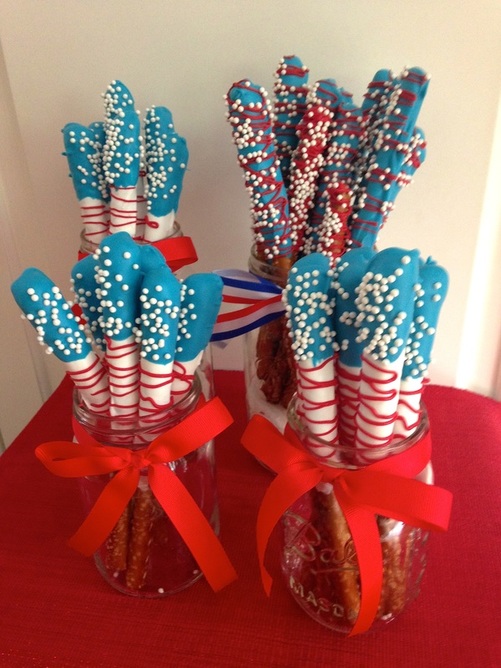 Happy 4th of July! Thanking God for this country and all the brave men and women who have fought to protect it and keep America free. Have a great Independence Day y'all!Enjoy your wedding flowers long after the wedding!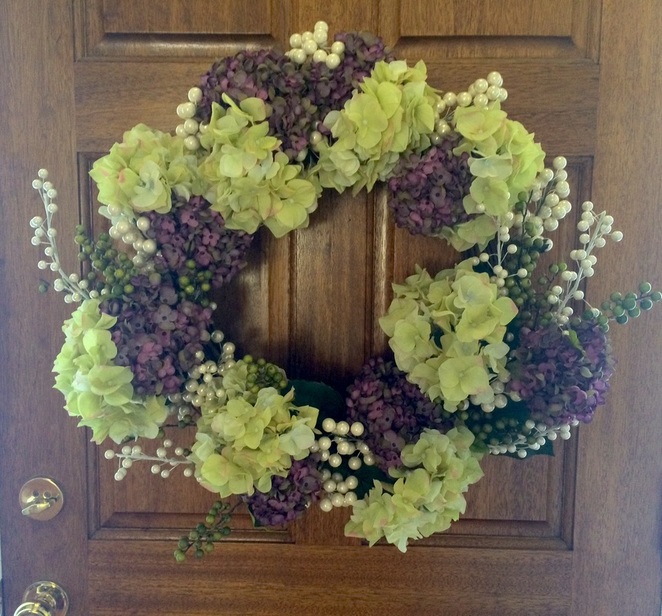 In our wedding, we mostly had all real flowers. We did, however, use a few artificial flowers to decorate a staircase at our venue. If you have any leftover artificial flowers from your wedding, here's a great way to save them and still enjoy them in something that will remind you of the beauty of your big day! I used the flower/pearl/berry clusters I had left over, a simple grapevine wreath, some floral wire, and wire cutters for this project. 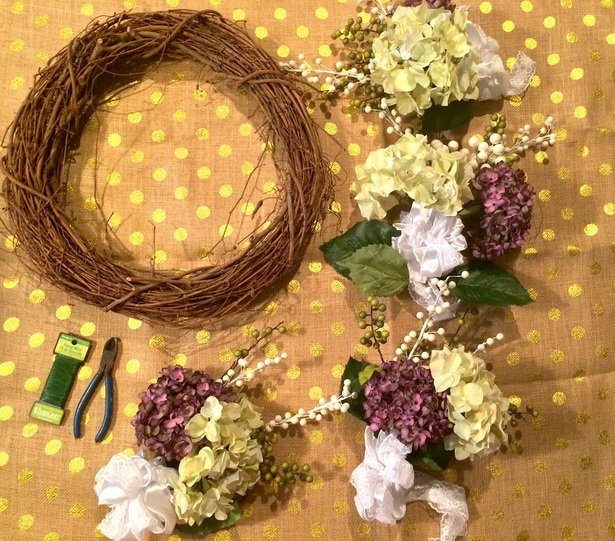 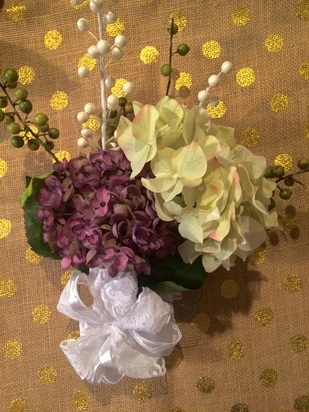 First, I cut the bows off of these flower clusters. Then I put the flower clusters in the wreath. It takes a bit to decide exactly where the flowers should go in the wreath and to arrange them hiding the stems. I used the floral wire to anchor the flowers into the grapevine wreath. To fill in the gaps, I used some leftover pearl clusters between the flower clusters. This added a little more shine and dimension to the wreath. Now I have a spring or summer wreath that is pretty AND reminds me of our wedding day! 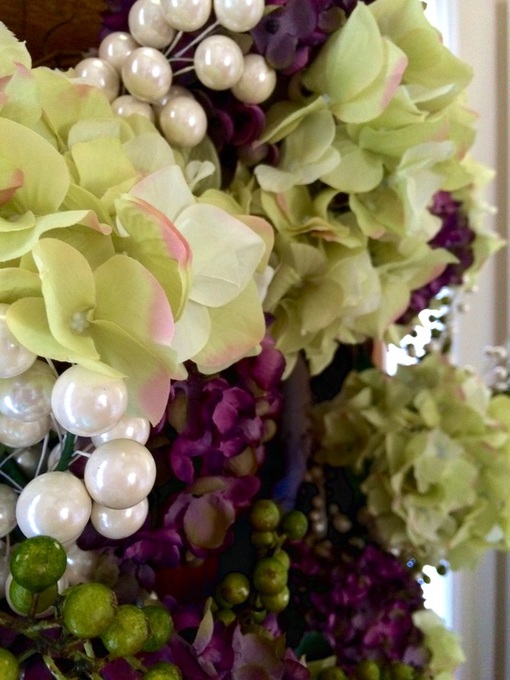 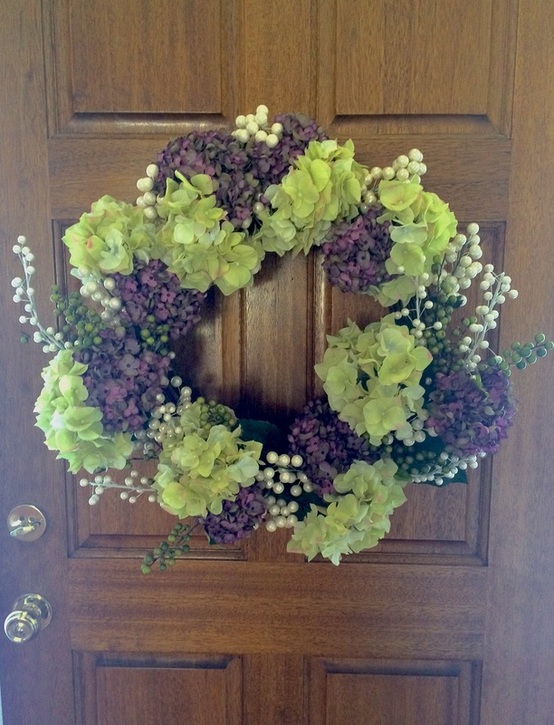 Perfect for lunch or appetizers for a big group! I found this recipe from a site called Bru Crew Life and made a few changes. You can find their website here. My mom and I decided to try making these for lunch one day…it's a unique combination, but they are awesome y'all! They turned out to be delicious…and really quick and simple to make! Try them out! Here's the recipe with the alterations we made: Ingredients 2 whole flour tortillas (It calls for burrito size, but we used 3 of the "Soft Taco" size tortillas) 1/2 cup shredded mozzarella cheese (We used a little more because we made 3 smaller quesadillas instead of 2 larger ones) 4 Tbsp. shredded chicken (We used 1 can of cubed chicken, and shredded it ourselves with a fork) 2 Tbsp. BBQ sauce (We used 3 Tbsp.) 1 whole avocado 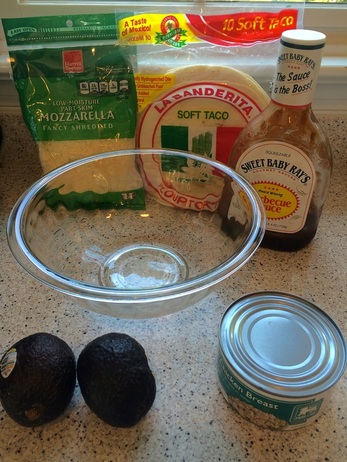 Instructions In a bowl, shred the can of chicken and combine it with the BBQ sauce. Cut avocado into chunks (original recipe calls for 1/2 cup avocado chunks, but we chunked the whole avocado). Heat a skillet up on medium heat. Lay 1 tortilla shell in the bottom of the skillet and sprinkle half of the shell with cheese. Top with around 2 Tbsp. of chicken mixture. Sprinkle with avocado chunks on top, then sprinkle with more cheese. Fold the shell over and heat for around a minute or two (until slightly browned). Carefully flip the shell over and heat the opposite side for another minute or two. Repeat with the remaining two shells and ingredients. Cut each quesadilla in half to make wedges. Serve and enjoy! 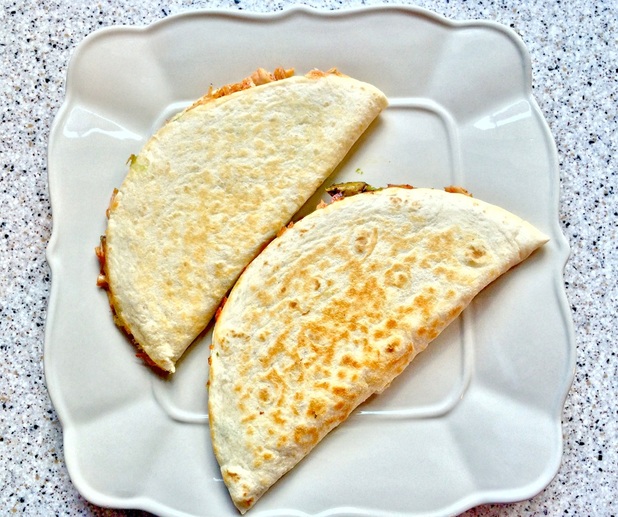 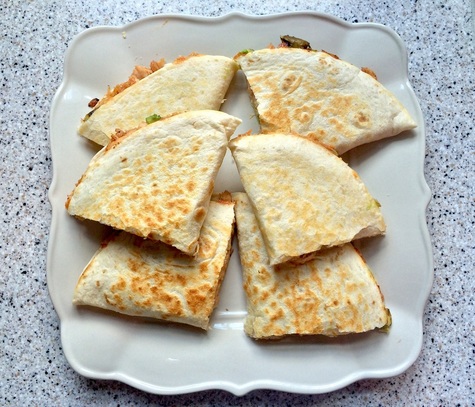 Father's Day Gift Basket!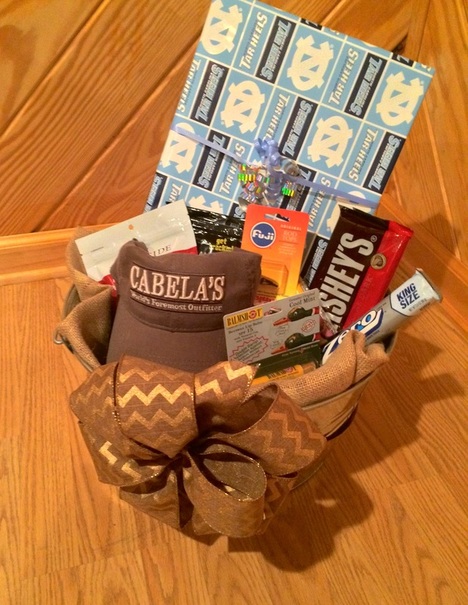 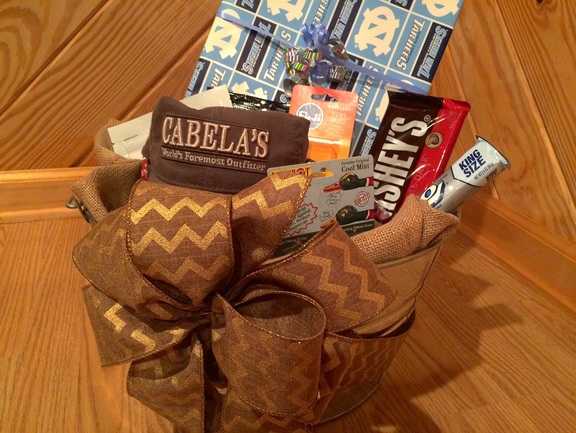 Father's Day is tomorrow…here's an idea for a simple gift! You could use this idea for a birthday, etc. as well. I just used a washtub instead of a regular basket to make it a little more rustic and fun for a guy. I found a few things at Cabela's for my dad…including this cute "BalmShot" lip balm that looks like it's a shotgun shell! It's a cute manly gift…find it here. I also picked up some of his favorite snack foods/candy to put in the tub! This is a perfect, simple way to customize a gift to someone's favorite things.  I used burlap fabric in the bottom of the tub for filler and a burlap ribbon bow to tie around the tub. 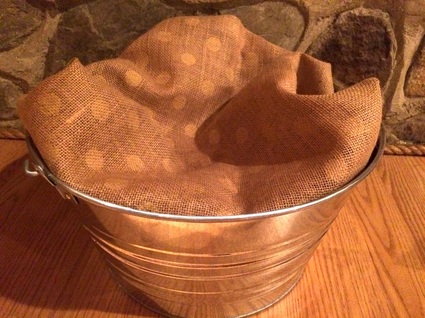 Then I arranged all of the gifts and snacks in the tub. I added a polo shirt wrapped in a shirt box to the gift basket as well…and it's in UNC wrapping paper! Perfect to add to the washtub! Here's the finished product. 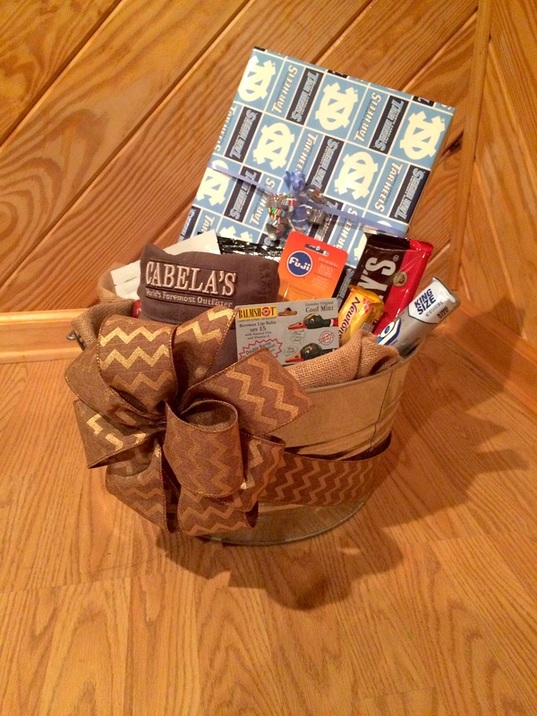 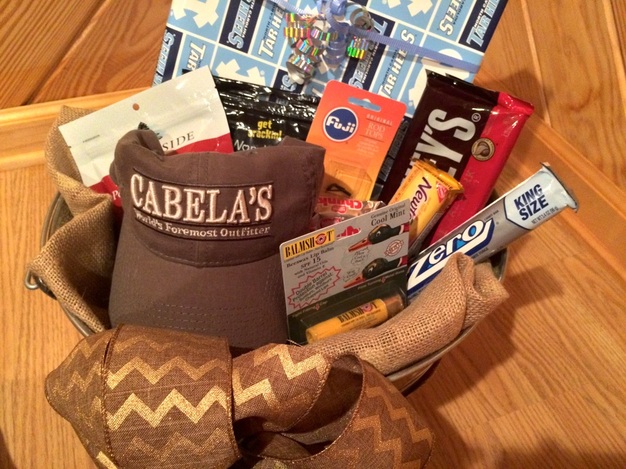 Happy Father's Day y'all!
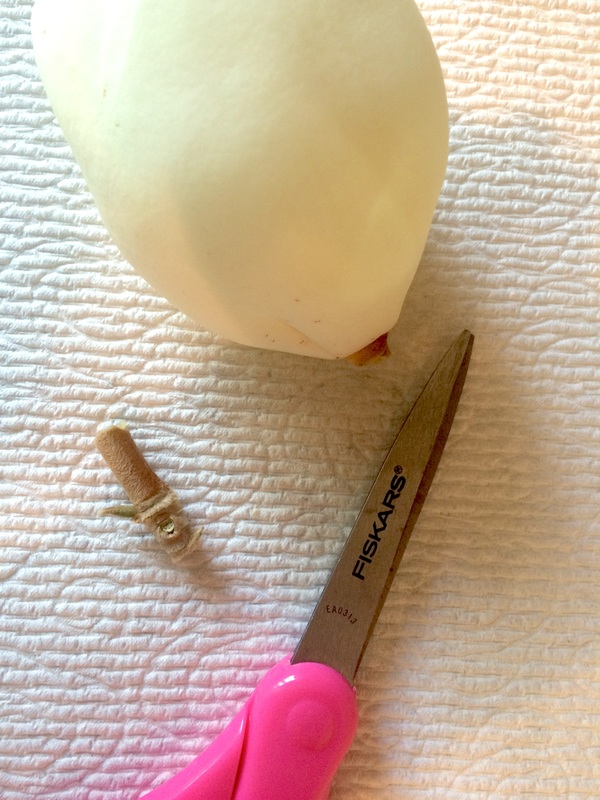
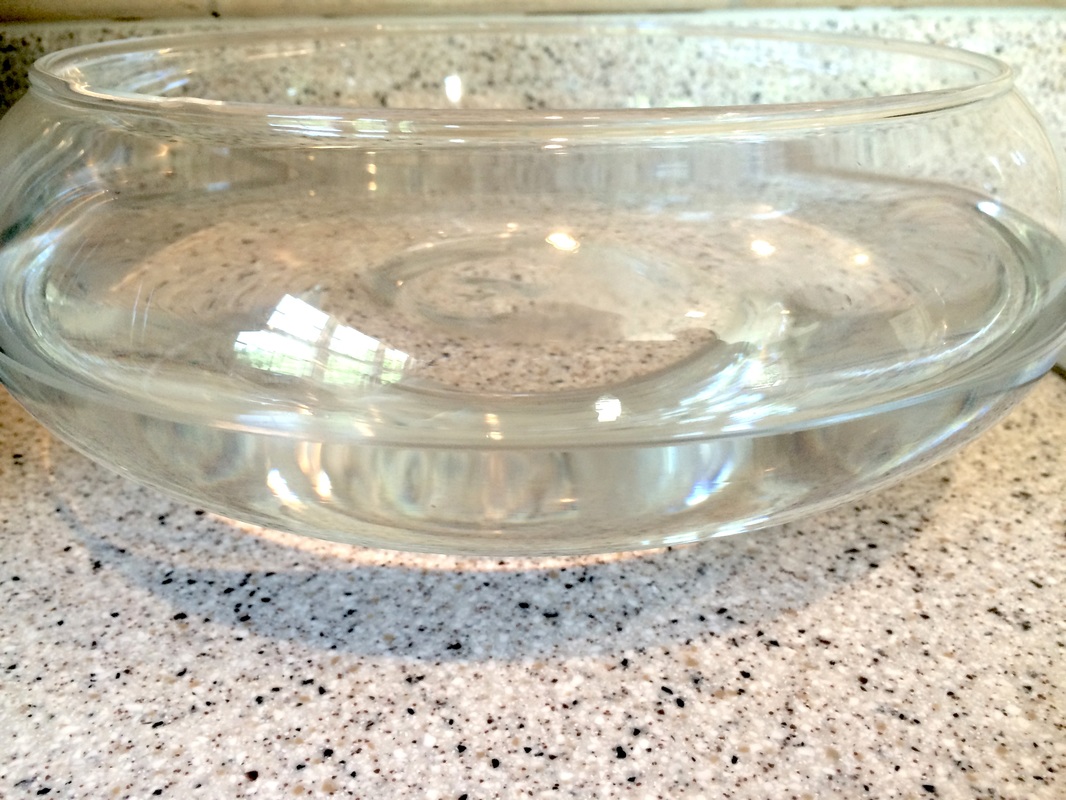
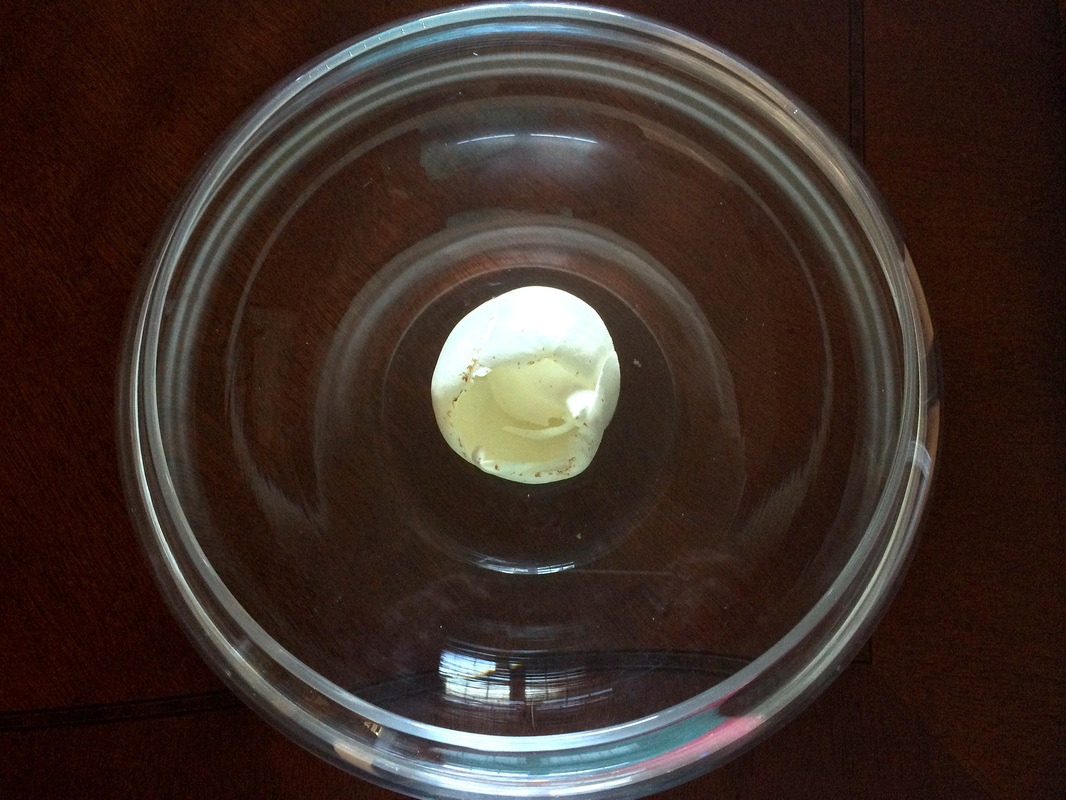
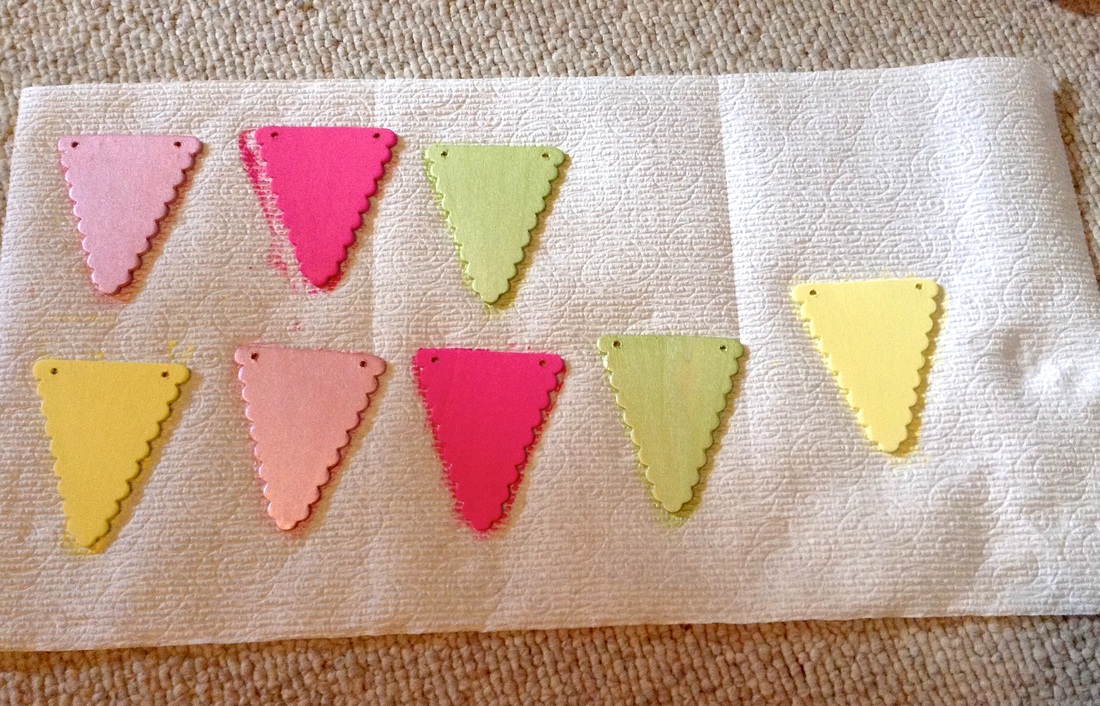
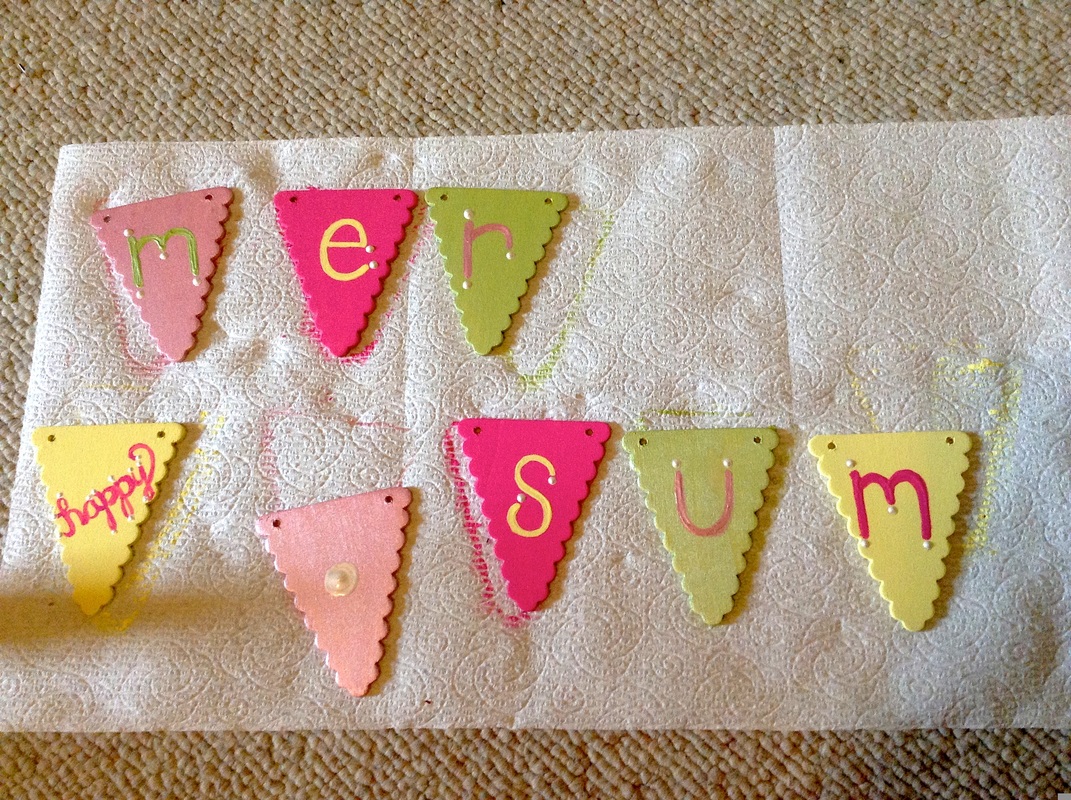
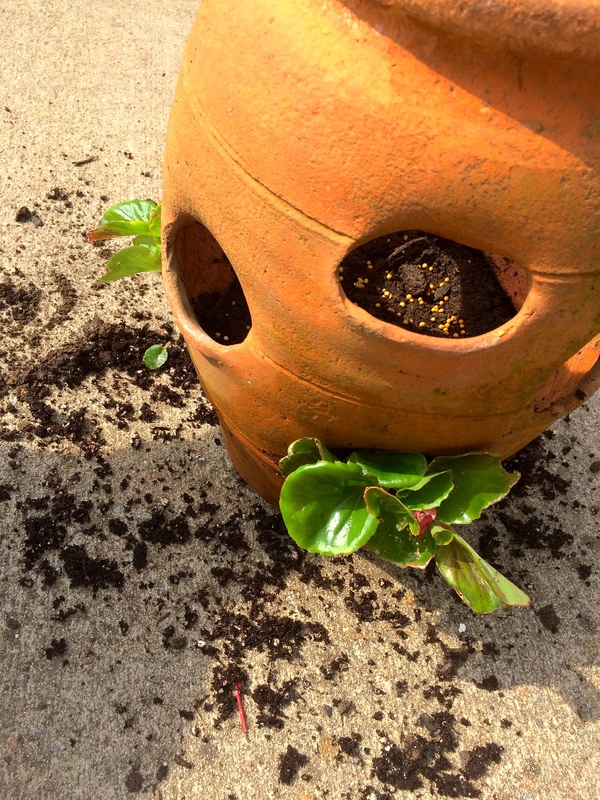
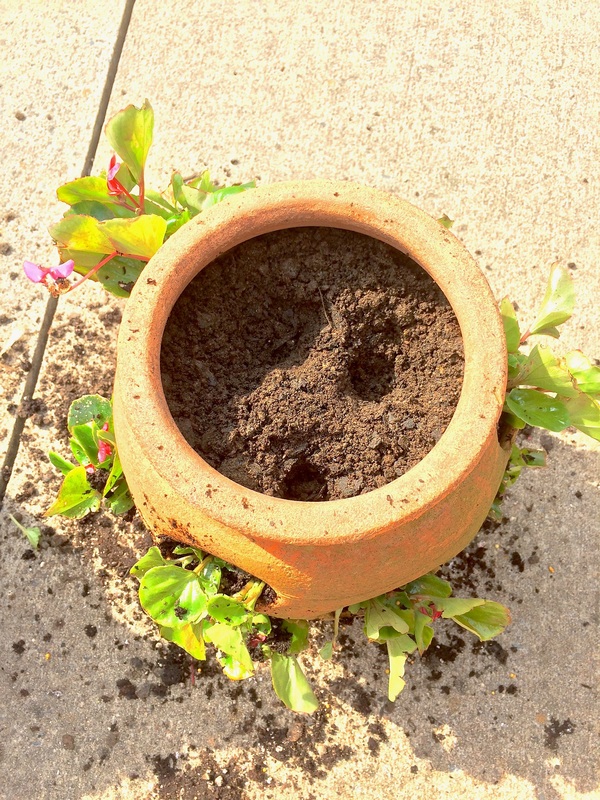
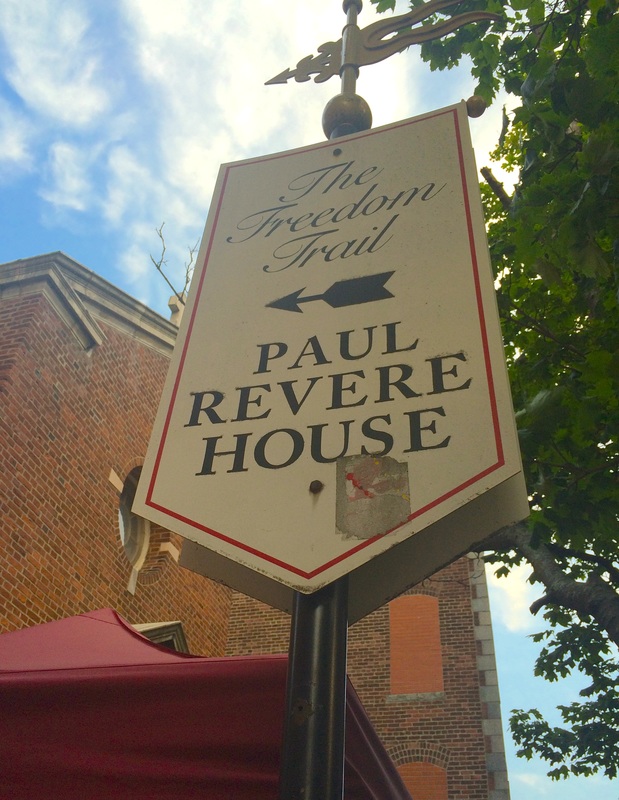
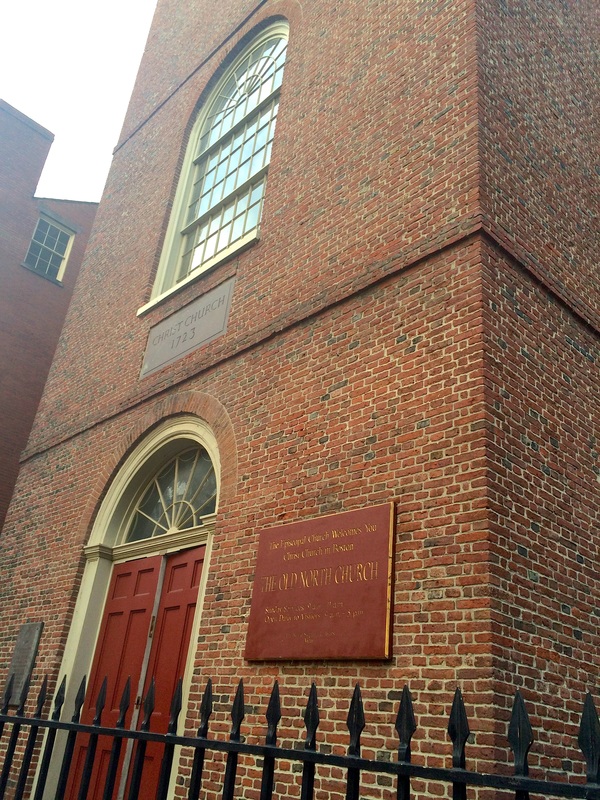
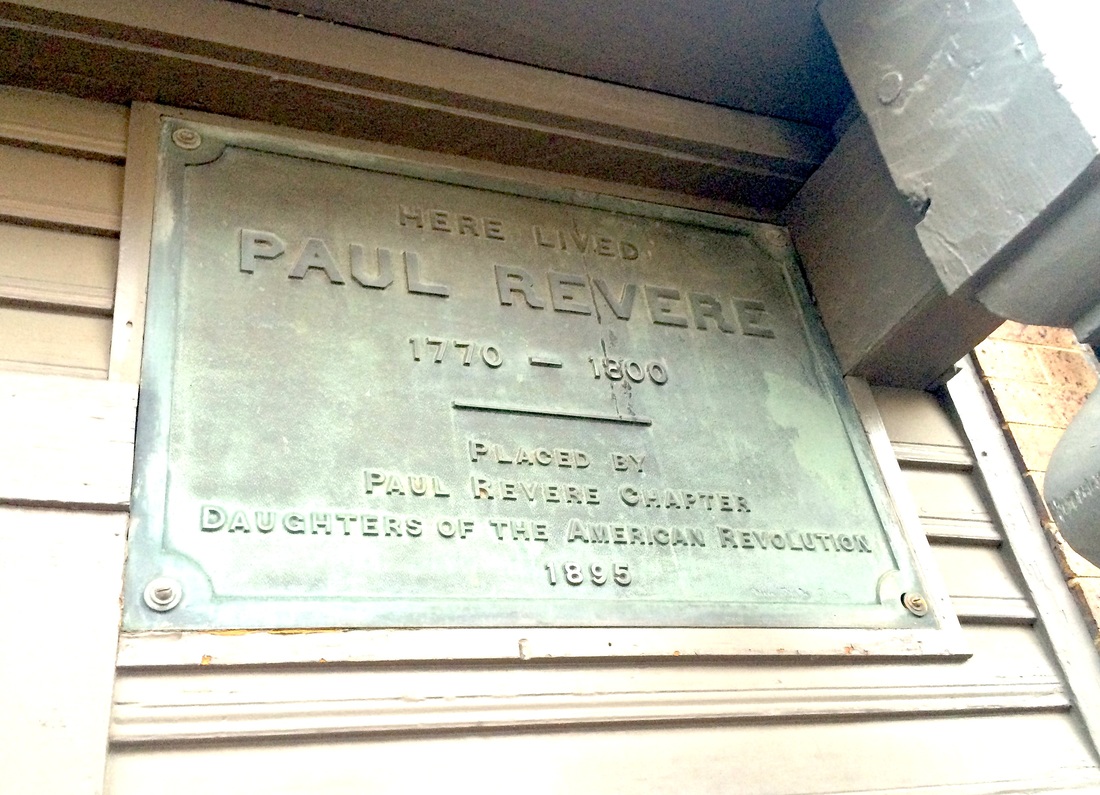
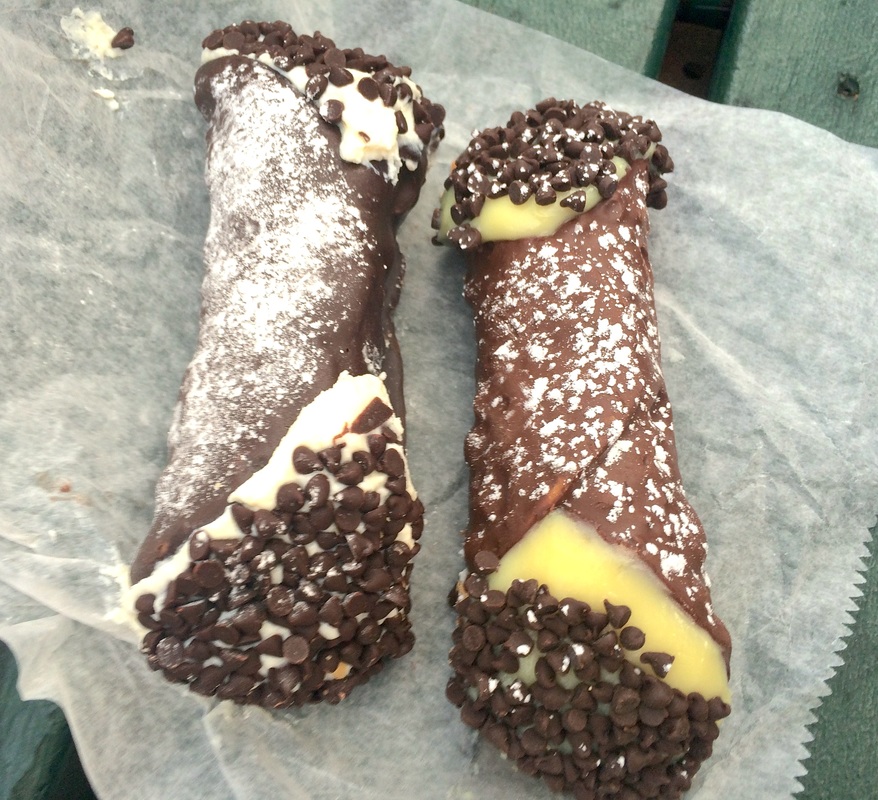
Floating Magnolia Bloom!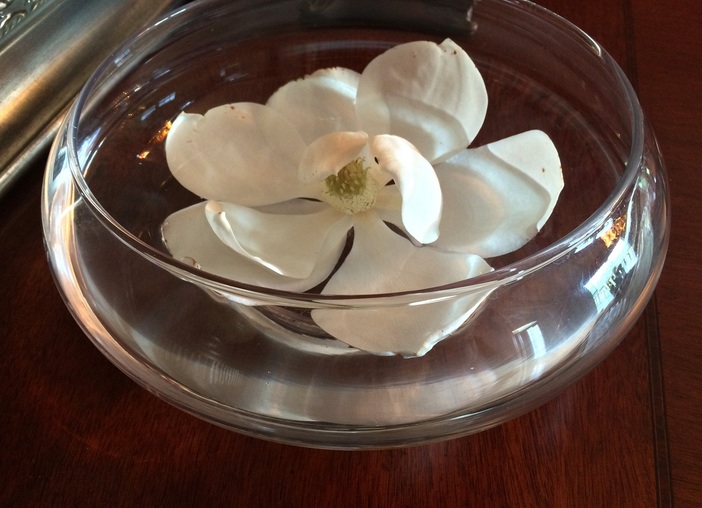 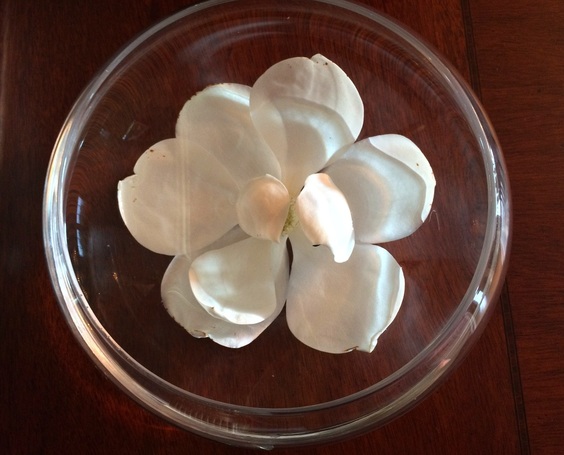 This is a cool little project to use as a pretty centerpiece or decoration…and it smells amazing! Magnolia blooms are so beautiful and a symbol of the South! If you have a magnolia tree nearby, you simply find a bloom that is still closed up (it hasn't opened up to full bloom yet), and cut it off the tree. All you'll need is a fairly shallow clear glass bowl (they are pretty easy to find), a pair of scissors, and the bloom. 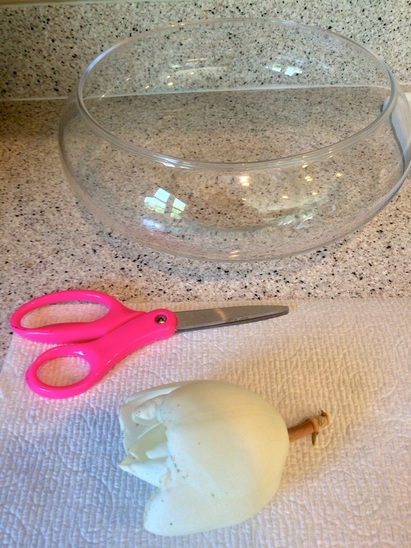 Snip the bloom to where there is hardly any stem left. This will help it float better in the water. Fill the bowl with water a little above halfway and gently place the bloom in the center of the water in the bowl. It will probably float around some and tilt before it actually opens up. It usually takes a day or overnight for the bloom to open up. I took these photos the next day. It opened up to be SO pretty and smells wonderful! 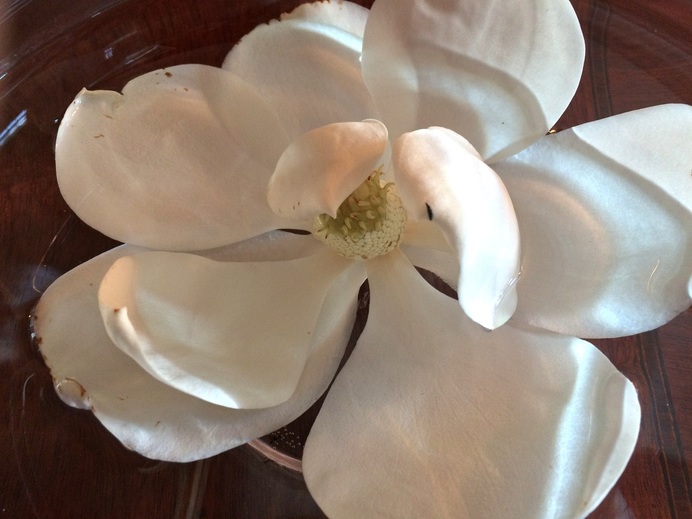 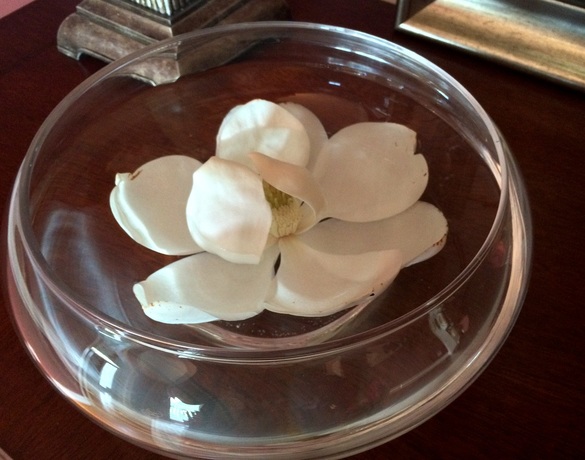 Painting mini wooden pennants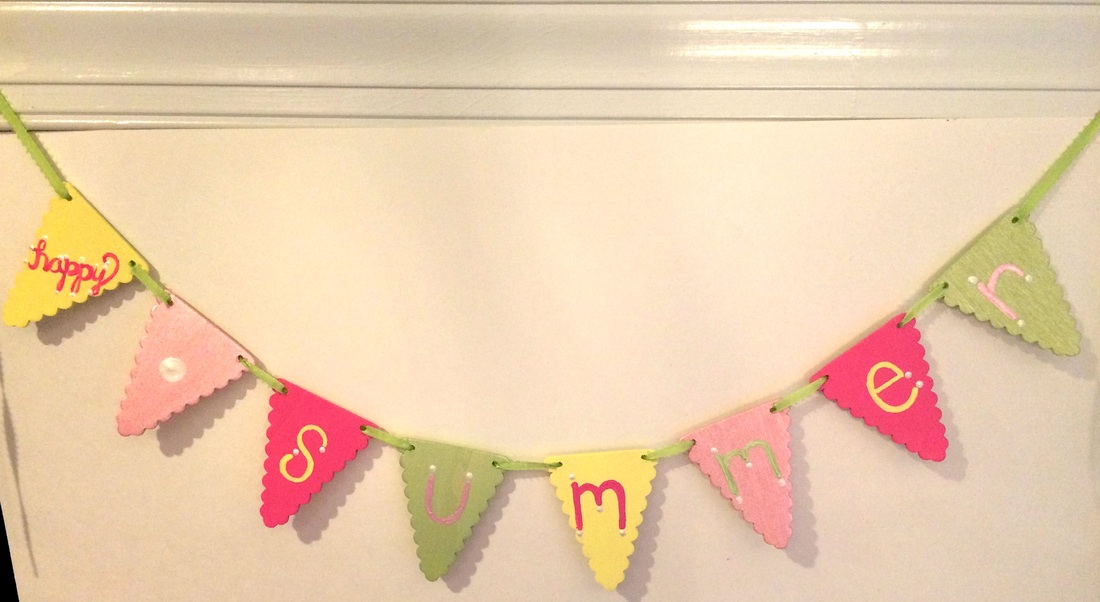 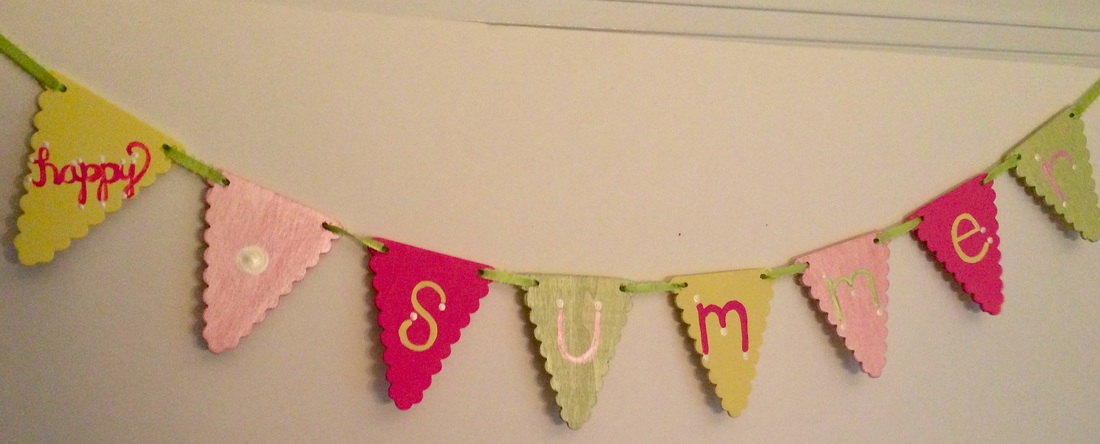 I found these adorable wooden mini pennants at Michael's and decided to turn them into a fun little summer project. I also found some simple, bright colors in acrylic paint…AND I found these PEARL acrylic colors in the Martha Stewart craft line! I love these cute acrylic paints because they have a little shimmer to them! I used some small paint brushes and some really thin lime green ribbon to string the pennants. This was a simple project but really fun and perfect for lots of other special occasions--showers, parties, etc. 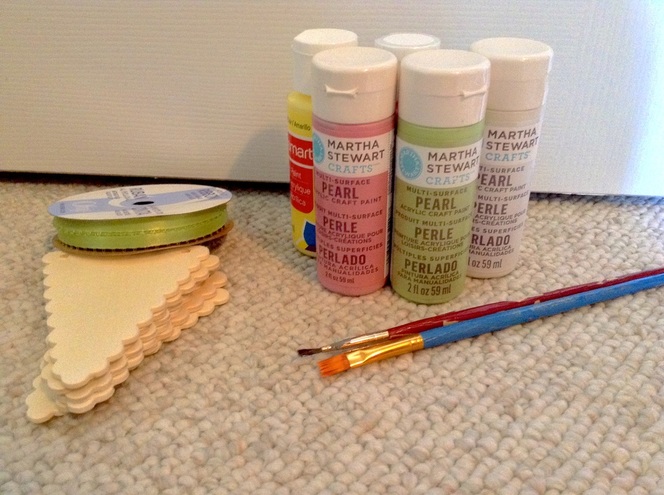 First, I chose which colors I wanted to paint on which pennants. I laid them out on a paper towel and used the thicker brush to paint (it washes off easily between colors). I painted the sides first, then the front. I let them dry for a while, then came back and painted the letters on with the thinner brush. I also used the thinner brush to do the white pearl dots on the letters! I let them dry then strung the ribbon through…Here is the finished product! 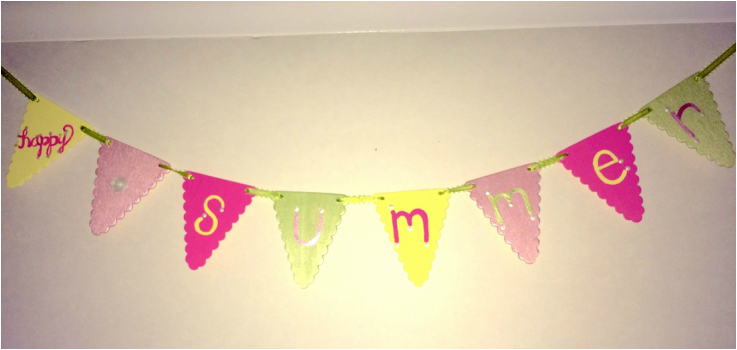 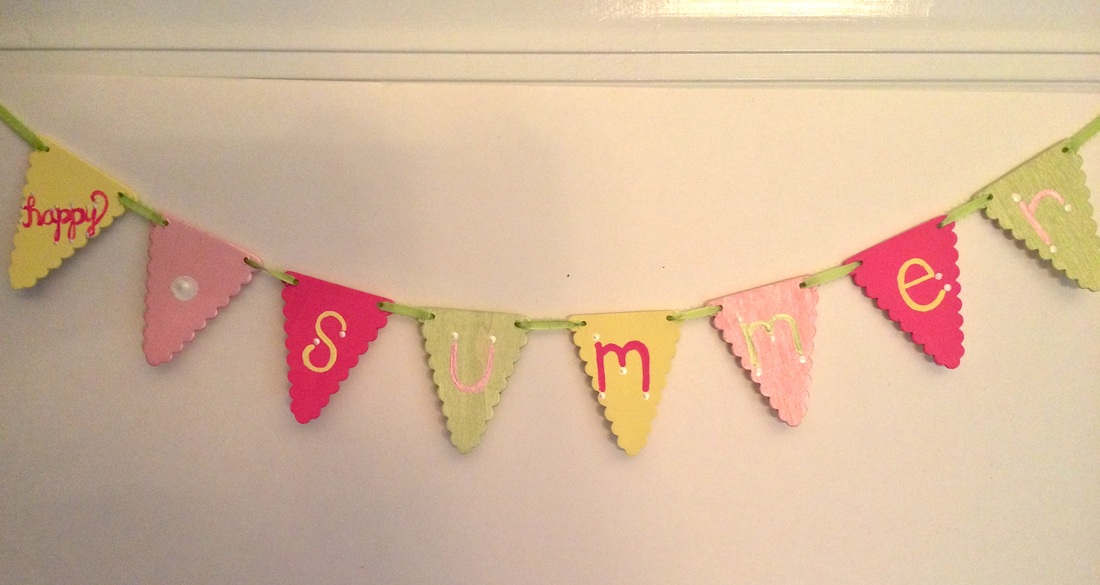 Outdoor summer flowers in a unique way!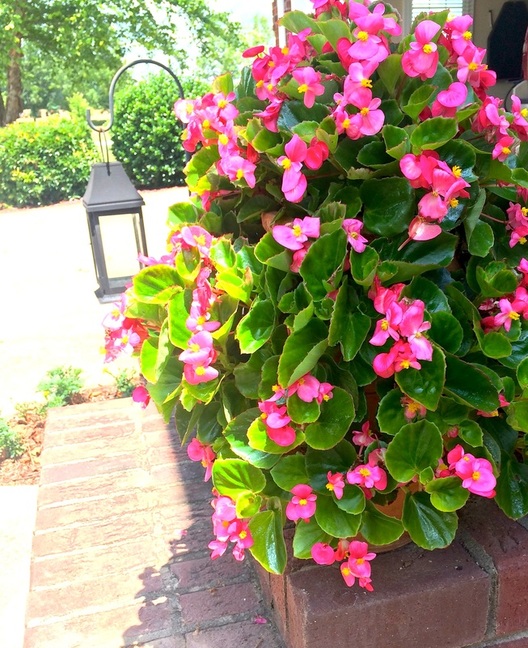 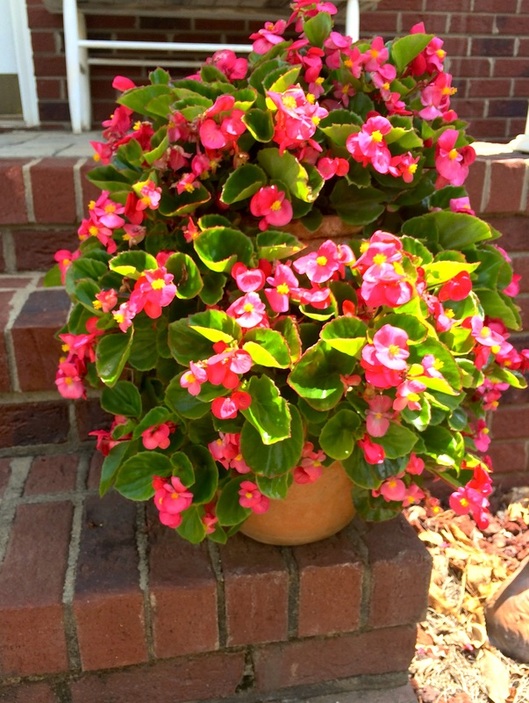 This is a fun summer project to try! My mom and I plant these every summer. It's a really unique way to plant colorful begonias in a "strawberry jar" and it turns out so pretty to display outside on the porch! We usually use the hot pink begonias, but the light pink color works well too. It's fairly simple to put together. You use a terra cotta "strawberry jar" (the tall jar with holes in it all around and a big hole in the top). You can find these in stores, on Amazon, or on other websites. We've had ours for years and they work great! You'll need: Strawberry jar, a bag of potting soil, gardening spade and gloves, Osmocote (plant food), and about 12 begonia plants (total). 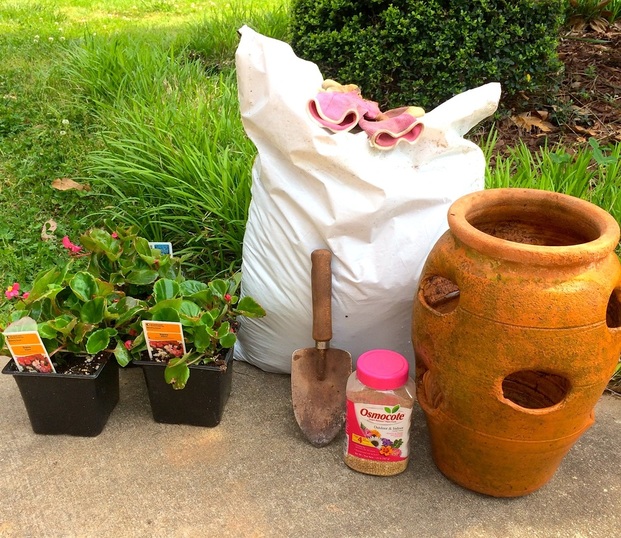 First, rinse the jar to clean it off. Then fill the bottom with potting soil to just under the first holes in the jar. Plant one begonia plant in each of the three bottom holes, and cover with a little more soil. Sprinkle a little Osmocote on the soil. Repeat those steps until all of the side holes in the pot are filled with flowers Then, plant the last three begonias in the top of the pot. Make sure to give it some water when you're finished! 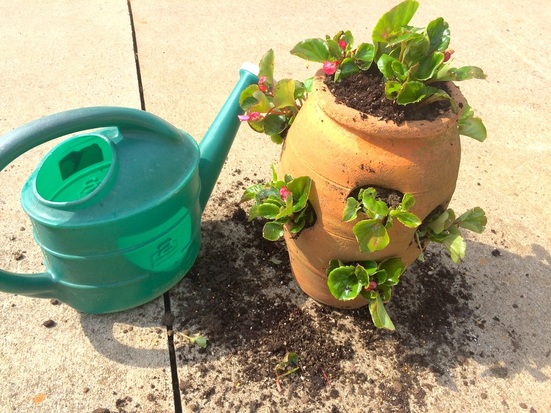 Here's the finished product…it looks pretty but give it a few weeks and it really fills out to look beautiful! 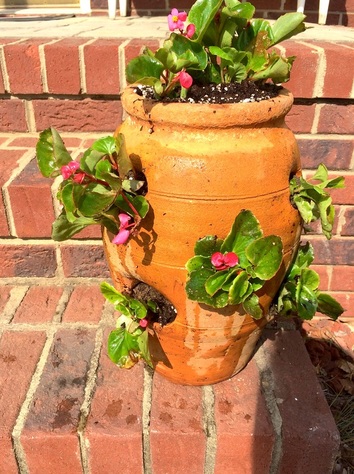  And 4 weeks later, here it is... 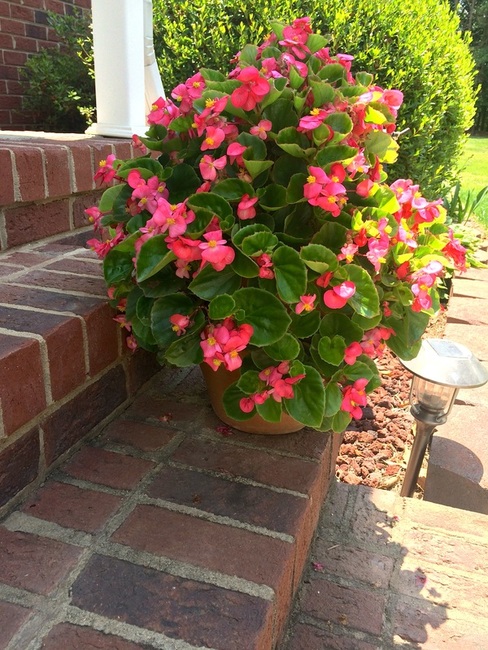 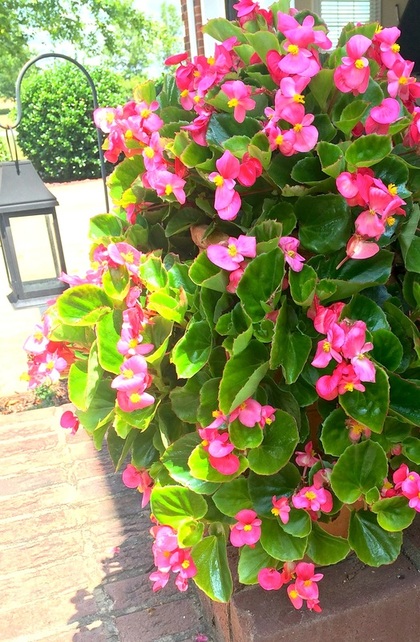 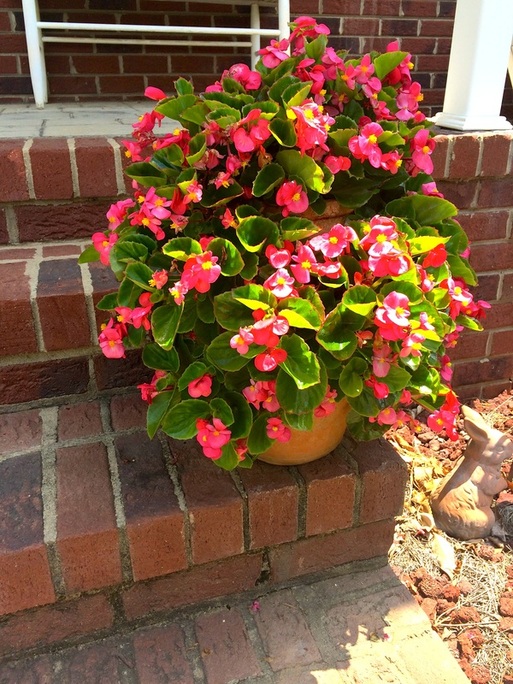 Fun times in downtown "Beantown"!Here are some pictures from our recent adventures in Boston…it's finally warm! Exploring your town is a really fun summer activity! We were lucky to have some friends show us around and give us a tour of part of the "Freedom Trail" as well! 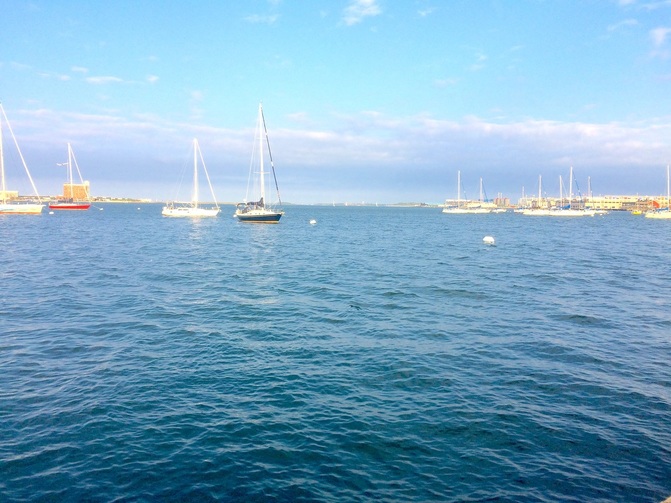 A date night at Long Wharf Harborwalk 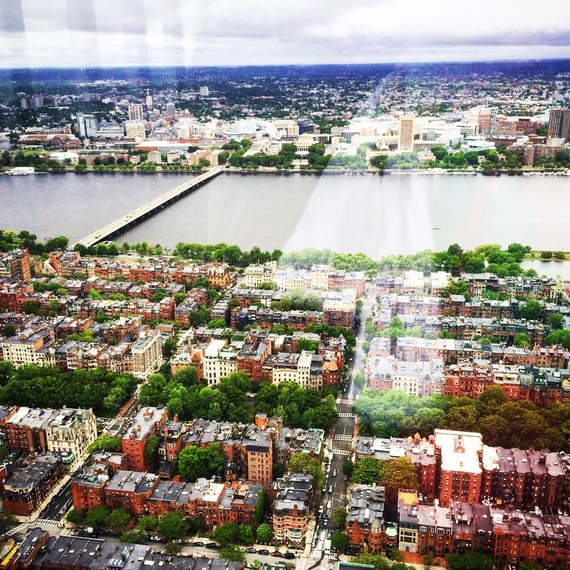 An awesome view of the city from the 50th floor of the Prudential Center…we had a great view of the Charles River. We could even see Fenway Park from another window! Our friends showed us part of the Freedom Trail, with lots of really cool historic marks. The picture on the right is the Old North Church, where Paul Revere hung the lantern…"One if by land, two if by sea!" We also saw Paul Revere's house! 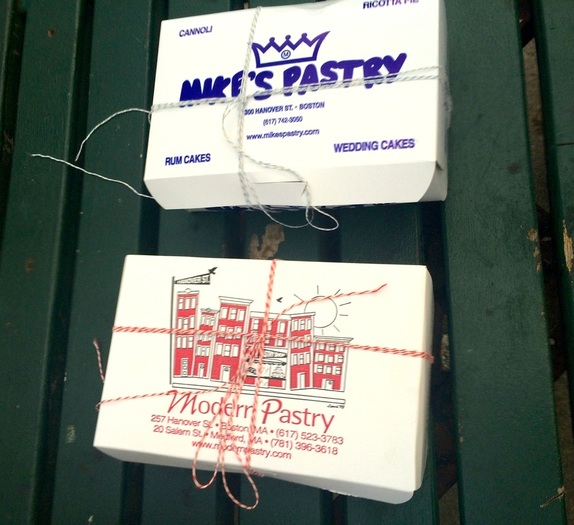 We spent an evening in the North End of downtown Boston…we went to dinner at one of the many awesome Italian restaurants there, then got a cannoli at each of the two famous pastry shops. There are two well-known bakeries in the North End of Boston: Mike's Pastry and Modern Pastry. We've been told that there is a big debate over which is better. We got both with our friends to try them out and see. Our conclusion was that both were awesome…don't really know if we could decide! |
BLOG OF A...Southern Belle and Carolina girl who loves Jesus, family, and life below the Mason-Dixon line. A Fan of Southern hospitality, grits and biscuits, pearls and bow ties, cotton and magnolias, sunshine and sweet tea, and all things monogrammed! Archives
December 2016
Categories |


 RSS Feed
